
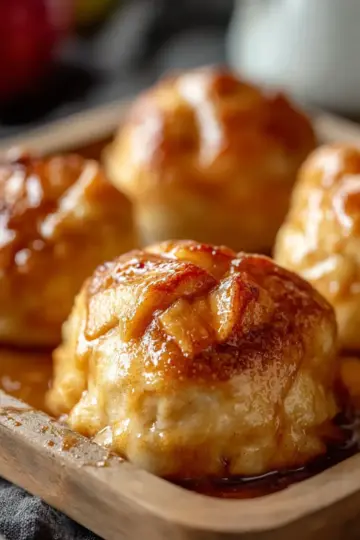
Introduction to Mini Egg Brownie Bites
As spring approaches, we all start to crave lighter, brighter flavors that mirror the blossoming season outside. Mini Egg Brownie Bites perfectly encapsulate that joy, combining rich, fudgy brownies with vibrant, crunchy mini chocolate eggs for a delightful twist. These little morsels are not only a feast for the eyes, but they’re also incredibly easy to make, making them a fantastic treat for gatherings or a special dessert after dinner.
Why Mini Egg Brownie Bites are the Perfect Spring Treat
Imagine the delight on your friends' faces as they bite into these Mini Egg Brownie Bites, revealing soft, chocolatey goodness accented by a delightful crunch. The beautiful pastel colors of the mini eggs add a festive touch, ideal for spring celebrations like Easter or garden parties.
Moreover, with just a handful of simple ingredients, you can whip up a batch in less than 30 minutes! According to experts, home-baked treats like these can foster connections and shared joy (source), making these brownie bites not only delicious but also a wonderful way to engage with loved ones.
If you’re ready to bring some spring cheer to your kitchen, let’s dive into the recipe and create these irresistible Mini Egg Brownie Bites!

Ingredients for Mini Egg Brownie Bites
Creating delightful Mini Egg Brownie Bites is easy when you have the right ingredients on hand. Here’s what you’ll need for a perfectly indulgent treat!
Essential ingredients for brownie bites
- 1 cup Granulated Sugar: This sweet base can also be substituted with coconut sugar for a deeper flavor.
- ⅓ cup Unsweetened Cocoa Powder: For a rich chocolate essence; consider Dutch-processed for added smoothness.
- ½ cup All-Purpose Flour: If you're gluten-sensitive, gluten-free flour is a fantastic swap.
- ¼ teaspoon Salt: Essential to enhance all those delicious flavors!
- ¼ teaspoon Baking Powder: Baking soda can serve as an alternative if necessary.
- ½ cup Unsalted Butter: To keep it dairy-free, use coconut oil or vegan butter.
- 2 large Eggs: If eggs aren’t your thing, flax eggs or applesauce will work perfectly!
- 1 teaspoon Vanilla Extract: An aromatic touch; you can substitute with almond extract if desired.
- 1 cup Mini Eggs: These are a must for the signature touch; feel free to swap with chocolate chips for variety.
Optional ingredients for substitutions and vegan options
Even with a concrete list, ingredient substitutions can make cooking fun and adaptable:
-
Coconut Sugar: A fantastic option for a caramel-like flavor.
-
Gluten-Free Flour: Perfect for those who need to avoid gluten entirely; many brands work well.
-
Flax Eggs: Mix 1 tablespoon of ground flaxseed with 2.5 tablespoons of water for an egg alternative.
Experimenting with ingredients allows you to personalize your Mini Egg Brownie Bites, making them suitable for everyone!
For extra inspiration, check out resources from Food Network for more baking tips and substitutes. Happy baking!
Step-by-step preparation for Mini Egg Brownie Bites
Baking is not just about following a recipe; it’s a joyful experience, especially when you’re making something as delicious as Mini Egg Brownie Bites. Let's dive into the steps to create these chewy treats that will have everyone asking for seconds!
Preheat the oven and prepare muffin trays
Start by preheating your oven to 350°F (175°C). This is crucial because a properly preheated oven ensures that your brownies bake evenly. While that’s warming up, grab two muffin trays and give them a light spray with baking spray or line them with muffin liners. This will help prevent the brownies from sticking, making it easier to pop them out once they’re done.
Sift together the dry ingredients
Next, sift together the granulated sugar, unsweetened cocoa powder, all-purpose flour, salt, and baking powder in a large mixing bowl. Sifting is key; it removes any lumps and blends the dry ingredients evenly, ensuring each bite of your Mini Egg Brownie Bites is perfectly flavorful.
If you’re curious about why sifting is essential, it’s because it not only aerates the ingredients but also helps avoid a dense final product, resulting in lighter, fluffier brownie bites!
Mix the wet ingredients into the dry mix
In a separate bowl, melt your unsalted butter until it’s just warm (not hot!) to the touch. Then, stir in the eggs and vanilla extract until well combined. This is where the magic begins! Pour the wet mixture into the dry bowl and mix it all together until just combined. Remember, over-mixing can lead to tough brownies, and we want them deliciously chewy!
Fold in Mini Eggs
Now, it’s time for the fun part—crushing your Mini Eggs! Gently fold these vibrant candies into your brownie batter, ensuring they’re evenly distributed. Not only do they add a delightful crunch, but they also bring that beautiful springtime color to your treats!
Fill the muffin cups and bake
Use a spoon or a cookie scoop to fill each muffin cup about two-thirds full with the Mini Egg Brownie Bites batter. It’s okay to be generous here! Then, pop them into your preheated oven. Bake for 10-12 minutes, until the edges look set. Remember that they will continue to cook slightly after being removed from the oven.
Add whole Mini Eggs before the final bake
For those extra special brownie bites, here’s a fun tip: right before you finish your baking, press a whole Mini Egg into the center of each baked brownie. This not only makes them visually appealing but also adds an extra burst of chocolate goodness to every bite!
Cool and transfer to a wire rack
Once the Mini Egg Brownie Bites are cooked through, pull them from the oven and let them cool in the tray for about 5 minutes. After that, carefully transfer them to a wire rack to cool completely. This step is essential—the cooling process helps them firm up, ensuring they hold their shape and texture when you go in for that first decadent bite.
Enjoy the process, share the love, and mark your spring celebration with these scrumptious brownie bites! If you’re looking to explore more delicious recipes, check out our other baking articles that are sure to inspire your culinary adventures.

Variations on Mini Egg Brownie Bites
Nutty Mini Egg Brownie Bites
If you love a little crunch in your Mini Egg Brownie Bites, consider adding your favorite nuts! Chopped walnuts or pecans elevate the texture and add a delicious flavor contrast. Just fold in ½ cup of your chosen nuts along with the crushed Mini Eggs for a delightful surprise in every bite. Not only do you get that nutty goodness, but you’re also adding some healthy fats and nutrients—can you say win-win?
Gluten-Free Mini Egg Brownie Bites
For those needing a gluten-free option, swap the all-purpose flour for a gluten-free blend, and you’re all set! Many popular brands, like Bob’s Red Mill or King Arthur Flour, offer excellent gluten-free all-purpose mixes that provide the same chewy goodness as traditional flour. The best part? These Mini Egg Brownie Bites won’t lose any flavor or texture, ensuring everyone can join in on the spring treat fun!
Don’t forget, if you are interested in learning about healthy substitutions, sites like Serious Eats provide great insights.
Cooking tips and notes for Mini Egg Brownie Bites
Ensuring perfect texture
To achieve that perfect fudgy texture in your Mini Egg Brownie Bites, be careful not to overmix your batter once you add the eggs and butter. Just mix until combined for a lighter, melt-in-your-mouth experience. Also, remember to bake them until slightly underdone; they will continue to firm up as they cool down. This will keep them rich and delicious!
Storing Mini Egg Brownie Bites effectively
To keep your Mini Egg Brownie Bites fresh and scrumptious, store them in an airtight container at room temperature for up to four days. For longer storage, you can freeze them—just wrap each brownie bite individually in plastic wrap and place them in a freezer bag. When you're ready to indulge, let them thaw on the counter or warm them up for a melty treat!
By following these simple tips, you'll be set for a delightful spring treat that everyone will love!

Serving Suggestions for Mini Egg Brownie Bites
Pairing with Drinks for a Delightful Treat
To elevate your Mini Egg Brownie Bites, consider pairing them with a delightful beverage. A creamy vanilla latte adds a lovely contrast to the rich chocolate flavor. If you’re in the mood for something cooler, a refreshing lemonade or a zesty sparkling raspberry drink provides a nice, fruity balance. For those cozy evenings, a warm cup of chai tea wraps everything together beautifully.
Serving Them at Gatherings or as Gifts
These charming Mini Egg Brownie Bites make perfect additions to any gathering or celebration. Arrange them on a colorful platter for a fun dessert table, or package them in cute boxes as thoughtful gifts. Everyone loves homemade treats, especially when they look this good! Just imagine the smiles on your friends’ faces when you present them with these delightful bites. For a unique twist, why not include a handwritten recipe card with your gift? It’s a personal touch they'll truly appreciate.
For more delightful drinks to pair with your treats, check out this article on creative beverage pairings.
Time Breakdown for Mini Egg Brownie Bites
Preparation Time
Get excited! The preparation for these Mini Egg Brownie Bites takes just about 15 minutes. That's just enough time to gather your ingredients and set the mood for some baking fun.
Baking Time
These delightful bites will need 13-15 minutes in the oven. You'll bake them in two stages, ensuring they rise perfectly while those Mini Eggs melt into sweet perfection.
Total Time
All in all, you're looking at about 30 minutes from start to finish. Perfect for a quick spring treat that brings joy and smiles to everyone at your gathering! Enjoy the process, and don’t forget to savor the aroma as they bake.
For more helpful tips and tricks on baking, check out resources like BBC Good Food or The Kitchn.
Nutritional Facts for Mini Egg Brownie Bites
Calories per serving
Each Mini Egg Brownie Bite contains approximately 120 calories, making it a decadent yet manageable treat for your spring gatherings.
Key nutrients
These delightful bites are not just scrumptious; they pack essential nutrients too! Each serving includes:
- Protein from eggs and butter for muscle repair
- Iron from cocoa powder to support energy levels
- Fiber from flour for digestive health
Allergen information
Mini Egg Brownie Bites contain common allergens such as eggs and dairy. They can be customized for gluten-free and dairy-free diets using alternatives like coconut oil or gluten-free flour. Always check ingredient labels to ensure safety. For a deeper dive into food allergies, sites like Food Allergy Research & Education provide valuable resources.
Why Mini Egg Brownie Bites are a Must-Try
As you prepare for your next spring gathering, why not add a touch of joy with these Mini Egg Brownie Bites? Perfectly portioned and visually appealing, they are sure to impress your friends and family. Enjoy the delightful combination of rich chocolate and colorful Mini Eggs – a treat that speaks to both the kid and adult in all of us! Are you ready to whip up a batch that'll leave everyone asking for seconds?
FAQs about Mini Egg Brownie Bites
Can I make them without eggs?
Absolutely! If you’re looking for an egg-free option, try using flax eggs or unsweetened applesauce as a substitute. Just mix one tablespoon of ground flaxseed with three tablespoons of water for each egg you're replacing, letting it sit for about five minutes until it thickens. This swap not only works for Mini Egg Brownie Bites but also keeps them deliciously moist.
What can I substitute for Mini Eggs?
If you can’t find Mini Eggs or prefer something different, regular chocolate chips are a fantastic alternative. You can also use crushed candies or dried fruits for a unique twist. The key is to maintain that indulgent chocolatey flavor while adding a fun texture.
How do I store leftover brownie bites?
To keep those Mini Egg Brownie Bites fresh and flavorful, simply store them in an airtight container at room temperature for up to three days. For longer storage, you can refrigerate them for about a week or freeze them for up to three months. Just make sure to wrap them well before freezing!
For more tips on baking storage, check out sources like the Food Network for expert advice!
Conclusion on Mini Egg Brownie Bites
In summing up, Mini Egg Brownie Bites are not just a delightful dessert; they embody the joy of creating homemade treats that bring a smile to every face. With their simple preparation, these bites are perfect for any spring gathering and make baking a joyful experience for everyone!

Mini Egg Brownie Bites for a Joyful Spring Treat
Equipment
- Muffin trays
- mixing bowls
- whisk
- Sifter
- measuring cups
- measuring spoons
Ingredients
For the Batter
- 1 cup Granulated Sugar Coconut sugar can also be used for a richer flavor.
- ⅓ cup Unsweetened Cocoa Powder Dutch-processed cocoa can be swapped for smoother texture.
- ½ cup All-Purpose Flour Gluten-free flour can be used.
- ¼ teaspoon Salt Essential for flavor balance.
- ¼ teaspoon Baking Powder Baking soda can work in a pinch.
- ½ cup Unsalted Butter Coconut oil or vegan butter can replace for dairy-free.
- 2 large Large Eggs Egg-free versions can use flax eggs or applesauce.
- 1 teaspoon Vanilla Extract Almond extract can be used, or omit entirely.
- 1 cup Mini Eggs Substitute with regular chocolate chips if desired.
Instructions
How to Make Mini Egg Brownie Bites
- Preheat the oven to 350°F (175°C) and prepare two muffin trays by spraying them with baking spray.
- Sift together granulated sugar, cocoa powder, flour, salt, and baking powder in a large bowl.
- Mix melted butter, eggs, and vanilla extract into the dry ingredients until well combined.
- Crush 1 cup of Mini Eggs into smaller pieces and fold them into the batter gently.
- Divide the batter evenly among the muffin cups, filling them two-thirds of the way; bake for 10-12 minutes.
- Press whole Mini Eggs into the brownie tops before finishing baking, then bake for an additional 3 minutes.
- Cool the brownies slightly before transferring them to a wire rack, and let them cool completely before serving.


Leave a Reply