
Introduction to Old-Fashioned Homemade Banana Pudding
There’s something undeniably comforting about old-fashioned homemade banana pudding. This classic Southern dessert has been delighting tastes since the 19th century, and it’s easy to see why! Made from scratch, this pudding combines layers of creamy vanilla custard, sweet banana slices, and crunchy vanilla wafers. It’s like a hug in a dish, perfect for family gatherings or a cozy night in.
Why is homemade banana pudding a timeless favorite?
The magic of homemade banana pudding lies in its simplicity and nostalgia. Many of us remember our grandmothers whipping it up for family celebrations, creating not just a dessert, but lasting memories. According to a survey by the American Pie Council, banana pudding consistently ranks among America’s favorite desserts.
What sets this dish apart is its versatility. You can enjoy it as an indulgent treat or share it at potlucks and holiday dinners. Plus, it’s a fantastic way to use ripe bananas that might otherwise go to waste! If you want to elevate your dessert game, this old-fashioned homemade banana pudding is a fantastic option that perfectly balances sweetness, texture, and flavor.
So let’s dive into the recipe and rekindle that childhood nostalgia!
Ingredients for Old-Fashioned Homemade Banana Pudding
Essential ingredients for the perfect pudding
To create Old-Fashioned Homemade Banana Pudding that will impress family and friends, you’ll need a handful of key ingredients that combine beautifully for that rich, creamy flavor.
- Sugar: ¾ cup for the perfect balance of sweetness.
- Flour: ¼ cup to achieve the ideal pudding consistency.
- Salt: Just a pinch to enhance the flavors.
- Milk: 3 cups of whole milk, as it adds creaminess.
- Eggs: You’ll need 3 eggs to create that luscious texture.
- Vanilla extract: 2 teaspoons for that classic vanilla flavor.
- Vanilla wafers: About an 8 oz box, which creates that delightful crunch.
- Bananas: Use 4 ripe bananas, sliced thin for optimal flavor and texture.
Recommended brands for vanilla wafers and bananas
For the vanilla wafers, opt for brands like Nilla Wafers or Keebler. They have a nice crunch that complements the creaminess of the pudding perfectly. When it comes to bananas, the sweeter, the better! Look for plump, slightly speckled bananas, as these ripe fruits will lend the best flavor to your pudding. An excellent choice is to grab organic bananas if available, as they tend to be more flavorful.
These ingredients are fundamental for making a traditional banana pudding that brings back warm memories of family gatherings. You’ve got this!
Preparing Old-Fashioned Homemade Banana Pudding
Creating a mouth-watering Old-Fashioned Homemade Banana Pudding is a lovely way to bring a nostalgic touch to your dessert table. Not only is it packed with rich, sweet flavors, but it also has a delightful texture that's irresistible. Let's dive into the step-by-step process of making this classic dessert that’s sure to impress your friends and family.
Gather Your Equipment and Ingredients
Before you begin, it’s essential to have everything ready. Here’s what you’ll need:
Equipment:
- Saucepan
- Mixing bowls
- 8x8 baking dish
Ingredients:
- ¾ cup sugar
- ¼ cup flour
- ¼ teaspoon salt
- 3 cups milk
- 3 eggs
- 2 teaspoons vanilla extract
- 1 box of vanilla wafers (about 8 oz.)
- 4 ripe bananas, sliced
Having your tools and ingredients prepped makes the cooking process seamless. If you're curious about the importance of fresh ingredients, check out this guide on the benefits of using fresh produce.
Create the Pudding Base
Start by making the pudding, as it forms the luscious core of this dessert. In a saucepan, combine the sugar, flour, and salt. Whisk in your milk vigorously, then place the saucepan over medium heat. Stir continuously until the mixture thickens and becomes bubbly—this should take about 10 minutes. Once it’s nice and thick, reduce the heat to low and let it cook for an additional two minutes.
Next, beat the eggs in a small bowl. Carefully add a ladle of the hot pudding to the eggs to temper them, then pour the egg mixture back into the saucepan. Return to heat and cook until you see gentle bubbles, about two more minutes, before adding the vanilla extract. This step adds a lovely aroma and depth of flavor.
Prepare the Layers
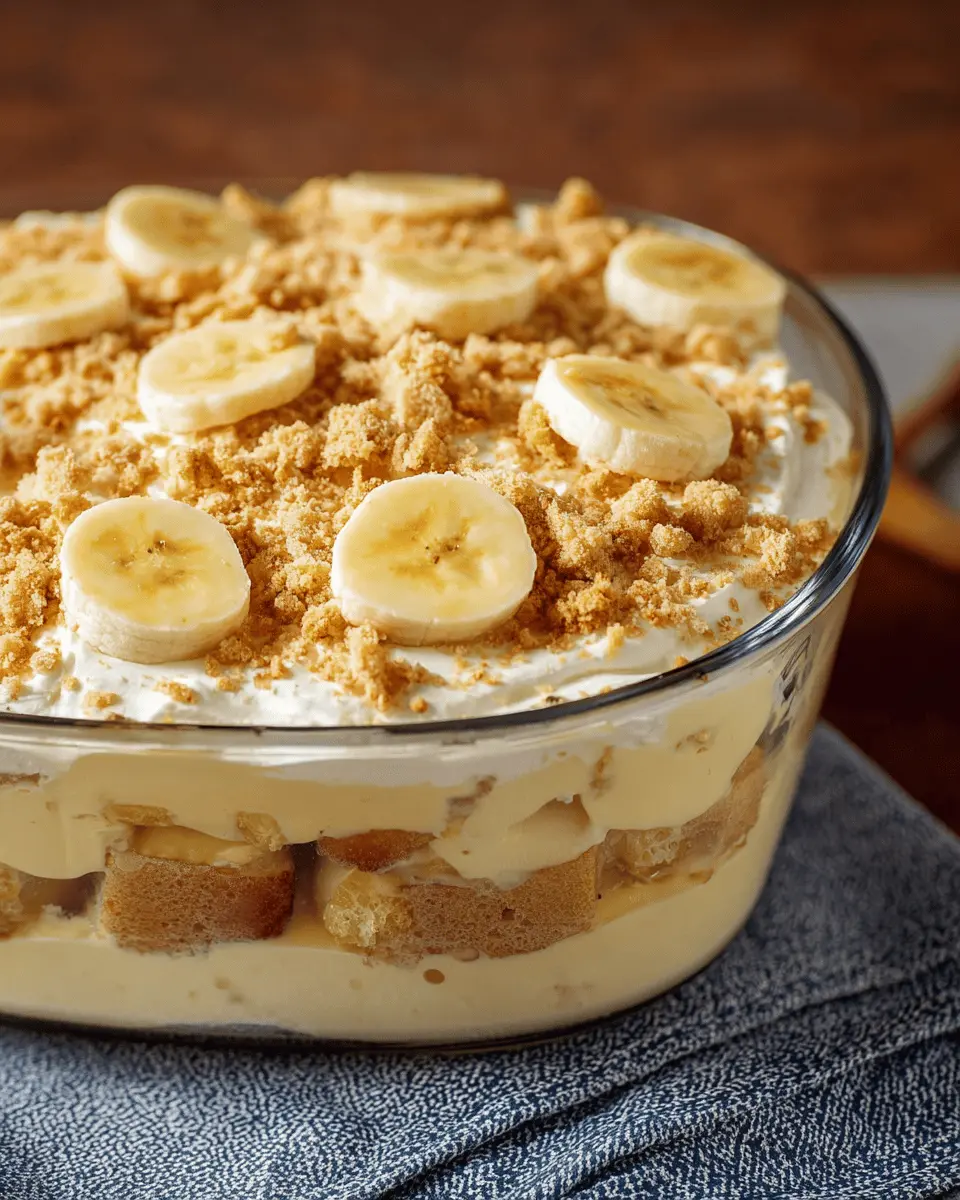
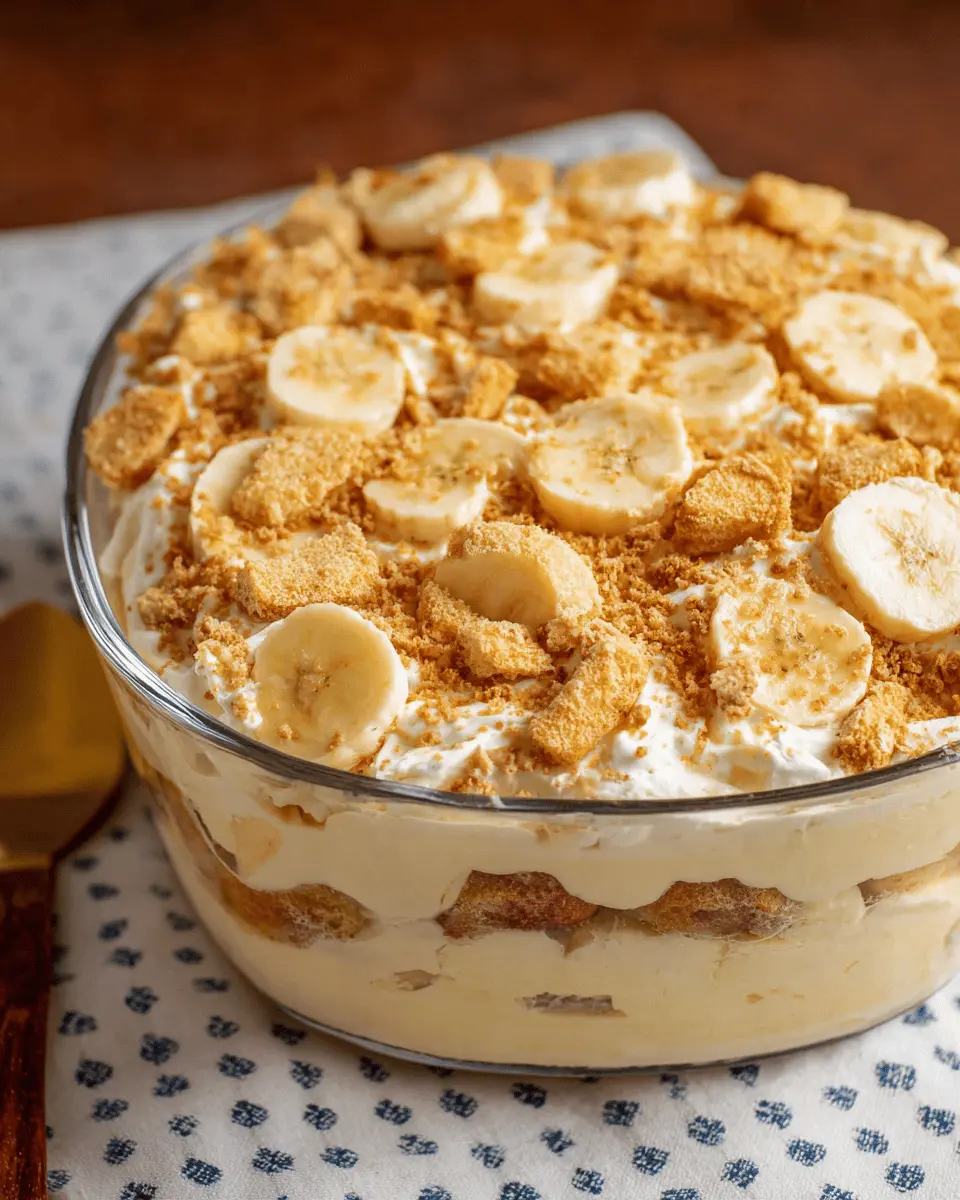
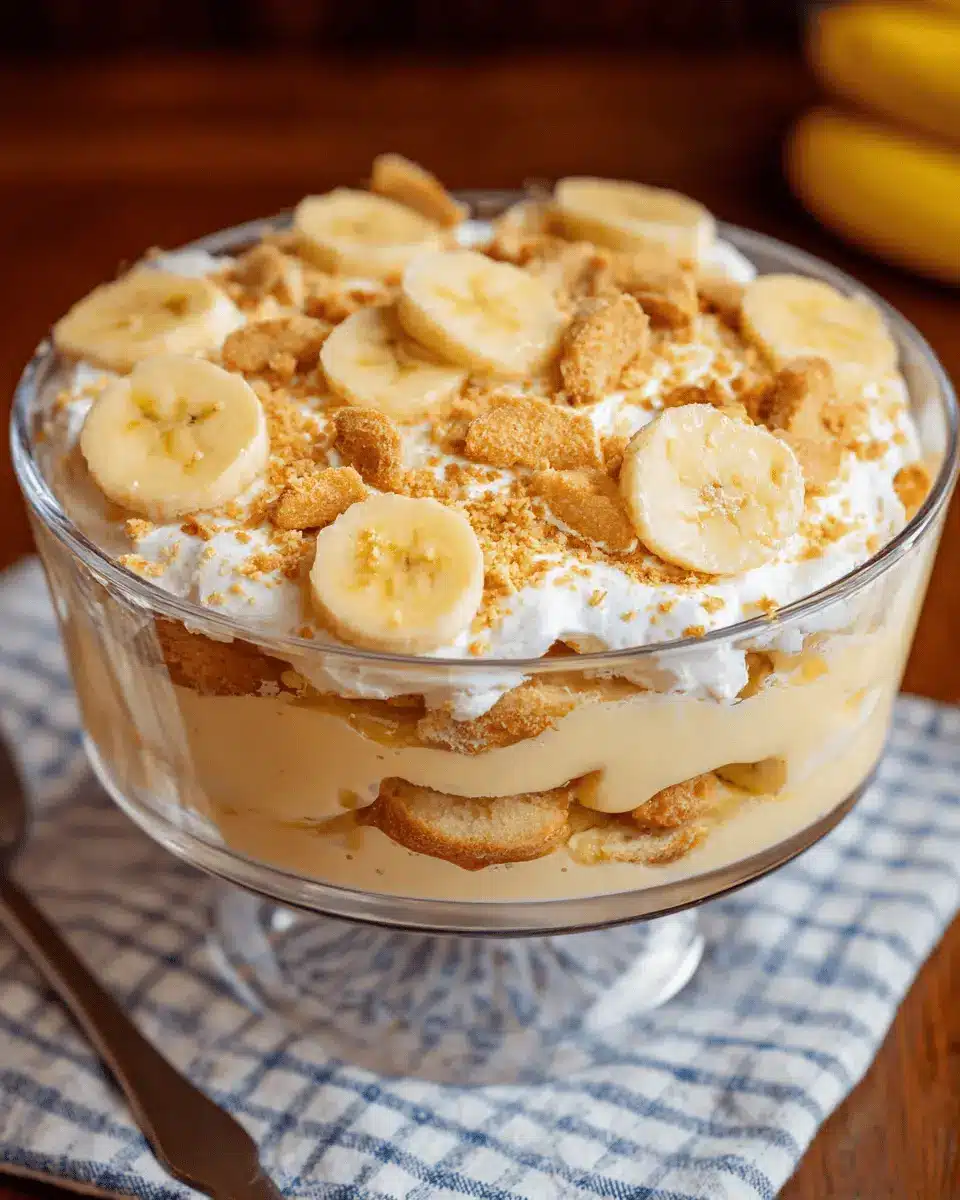
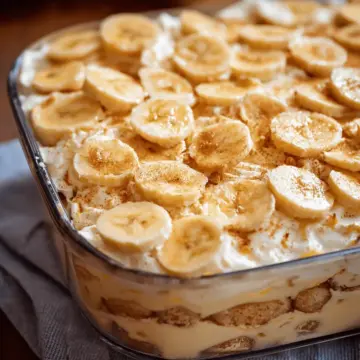
While the pudding cools slightly, it’s time to prep the layers. In an ungreased 8x8 inch baking dish, Line the bottom with about 25 vanilla wafers, creating a nice crunchy foundation. Then, layer half of the sliced bananas on top. The contrasting textures of creamy pudding, soft bananas, and crispy wafers can transport you back to warm summer days.
Assemble Your Banana Pudding
To create your Old-Fashioned Homemade Banana Pudding, pour half of the pudding over the banana and wafer layer. Repeat this layering process with the remaining vanilla wafers, bananas, and pour the last of the pudding on top, creating a beautiful final layer.
Chill Before Serving
Cover your dish with plastic wrap and let the pudding chill in the refrigerator for at least four hours—overnight is even better. This resting time allows the flavors to meld and the wafers to absorb some creaminess, making each bite heavenly. Before serving, consider crushing some remaining wafers on top for that added crunch and a lovely presentation.
And there you have it! A step-by-step guide to preparing delicious Old-Fashioned Homemade Banana Pudding. This dessert not only delights the taste buds but also evokes fond childhood memories. Enjoy!
Variations on Old-Fashioned Homemade Banana Pudding
Chocolate Banana Pudding Twist
Why not elevate your classic Old-Fashioned Homemade Banana Pudding with a delightful chocolate twist? Simply add cocoa powder to your pudding mixture—around a half-cup should do the trick! This rich addition pairs beautifully with the bananas and vanilla wafers, creating a decadent dessert. For an extra touch, consider drizzling chocolate syrup between the layers or topping with mini chocolate chips. The blend of chocolate and banana is a match made in dessert heaven!
Alternative Fruit Layers for Freshness
Feeling adventurous? You can swap out bananas for other fruits to refresh your Old-Fashioned Homemade Banana Pudding! Layers of strawberries, blueberries, or even peaches complement the creamy pudding perfectly. Each fruit adds a unique twist and bursts of flavor that keep this dessert exciting. Mixing sliced fruits with your bananas can also create a colorful medley that looks as good as it tastes—perfect for impressing guests at your next gathering!
Cooking Tips and Notes for Old-Fashioned Homemade Banana Pudding
How to avoid a lumpy pudding
To achieve a smooth and creamy Old-Fashioned Homemade Banana Pudding, whisking is your best friend! Start by gradually adding milk to your dry ingredients while whisking continuously to prevent lumps. When incorporating eggs into the hot mixture, add just a small amount first to temper the eggs, then mix thoroughly before blending back into the pot. This gentle approach ensures a velvety texture.
Ensuring banana freshness
Fresh bananas make all the difference in your pudding! Look for slightly speckled bananas; they’re ideal for sweetness and flavor. If you're unsure about ripeness, remember that a bright yellow color often signals perfect readiness. For added protection against browning once sliced, you can lightly coat them with lemon juice, keeping your pudding looking as delightful as it tastes!
Serving Suggestions for Old-Fashioned Homemade Banana Pudding
Garnishing Ideas for Presentation
To take your Old-Fashioned Homemade Banana Pudding to the next level, consider these decorative touches:
- Fresh Banana Slices: Add a few extra banana slices on top for a pop of color.
- Whipped Cream: A dollop of freshly whipped cream can not only enhance texture but also add a touch of elegance.
- Chocolate Shavings: If you enjoy a bit of chocolate, sprinkle some dark chocolate shavings for a contrast that’s visually enticing and delicious.
Pairing with Complementary Dishes
Serving your Old-Fashioned Homemade Banana Pudding as a stand-alone dessert is fantastic, but it pairs beautifully with:
- Grilled Chicken or Beef Tacos: The savory flavors wonderfully balance the sweetness of the pudding.
- A Fresh Salad: Consider a light arugula salad with lemon vinaigrette for a refreshing counterpoint.
- Brewed Iced Tea: This classic drink is perfect for sipping alongside your pudding, enhancing the overall experience.
Elevate your dessert game by being creative with these serving suggestions!
Time Breakdown for Old-Fashioned Homemade Banana Pudding
Preparation Time
Getting your ingredients together and following the steps for this delicious Old-Fashioned Homemade Banana Pudding will take about 20 minutes. Just enough time to gather your favorite kitchen tools and get your creative juices flowing!
Chilling Time
The critical part of this recipe is the chilling phase, where you’ll need to let your pudding rest in the refrigerator for at least 4 hours, but overnight is even better. This waiting game allows the flavors to meld together for a truly delightful dessert experience.
Total Time
From start to finish, you’re looking at a total time of 4 hours and 20 minutes. Most of that time is hands-off, so you can kick back or get other tasks done while the pudding chills! For a smooth and tasty result, be sure to plan ahead.
For those who crave a bit more sweetness, consider checking out this guide on how bananas can enhance your dessert for additional tips. Enjoy your pudding!
Nutritional Facts for Old-Fashioned Homemade Banana Pudding
Calories per serving
Each serving of Old-Fashioned Homemade Banana Pudding packs about 221 calories. It's a delightful treat without overwhelming your caloric intake, perfect for indulgence after a long day at work.
Key nutrients breakdown
This comforting dessert not only satisfies your sweet tooth but also offers essential nutrients, including:
- Carbohydrates: 40g, providing a quick energy boost
- Protein: 6g, essential for muscle repair and growth
- Fat: 5g, keeping your dessert rich and creamy
- Fiber: 2g, aiding in digestion
With a mix of vitamins and minerals, this banana pudding can be a cheerful addition to your dessert roster! If you're curious about more health benefits of bananas or the nutritional value of other ingredients, consider checking out resources like Healthline or NutritionData.
FAQs about Old-Fashioned Homemade Banana Pudding
How can I make my pudding creamier?
If you want your Old-Fashioned Homemade Banana Pudding to have an extra creamy texture, consider adding a bit of heavy cream to the milk mixture. You could use a combination of whole milk and heavy cream (try 2 cups milk and 1 cup heavy cream) for that luscious, velvety finish. Also, be sure to cook the pudding until it's fully thickened for the best results.
Can I make banana pudding ahead of time?
Absolutely! One of the best aspects of Old-Fashioned Homemade Banana Pudding is that it actually tastes better after sitting in the refrigerator for a few hours or even overnight. Just prepare it a day ahead for optimal flavor and texture.
What’s the best way to store leftover pudding?
To keep your pudding fresh, cover it tightly with plastic wrap or store it in an airtight container. Just remember, bananas can brown, so if you plan to enjoy it later, you might want to add fresh bananas just before serving. Enjoy this delightful dessert and check out our other recipes for ideas on items to serve alongside!
Conclusion on Old-Fashioned Homemade Banana Pudding
In conclusion, Old-Fashioned Homemade Banana Pudding is a timeless treat that brings comfort and nostalgia to any gathering. The layers of creamy vanilla pudding, sweet banana slices, and crunchy vanilla wafers create a delightful harmony of textures and flavors. Serve it chilled to impress your family and friends all year round! For more dessert inspiration, check out sites like Taste of Home or Food Network for additional recipes.
Old-Fashioned Homemade Banana Pudding
Equipment
- Sauce Pan
- mixing bowls
- 8x8 baking pan
Ingredients
Dry Ingredients
- ¾ cup sugar
- ¼ cup flour
- ¼ teaspoon salt
Wet Ingredients
- 3 cups milk
- 3 units eggs
- 2 teaspoons vanilla extract
Additional Ingredients
- 1 box Vanilla wafers about 8 oz.
- 4 units bananas sliced
Instructions
Preparation Steps
- In a saucepan, mix the sugar, flour, and salt.
- Whisk in the milk and cook over medium heat.
- Allow to cook until thickened and bubbly. Reduce heat to low and cook an additional 2 minutes.
- Remove from heat.
- In a small bowl, whisk together the eggs.
- Add in a small amount of the hot mixture to the eggs and mix.
- Add egg mixture to hot mixture and return to heat. Heat until a gentle boil starts, cook for about 2 minutes.
- Add in vanilla and remove from heat. Allow to cool for about 15 minutes, stirring every few minutes.
- In an ungreased 8-inch square pan, layer about 25 vanilla wafers on bottom, followed by half of the banana slices.
- Pour half the pudding mixture on top. Follow layers one more time, ending with pudding layer.
- Cover dish with plastic wrap and place in the refrigerator. Allow to chill for a minimum of 4 hours, preferably overnight.
- Prior to serving, crush remaining wafers on top of pudding. Serve cold!

Leave a Reply