
Introduction to Easy No Knead Artisan Bread
In today’s fast-paced world, finding time to make meals can feel like a daunting task for young professionals. As a solution, homemade bread might be the answer you never knew you needed. This is where the easy no knead artisan bread comes in. Perfect for those long hours spent at work, this bread requires minimal effort while delivering maximum flavor.
Why is making your own bread an excellent choice for busy folks? For starters, it’s not just about saving money—although that’s a bonus! The health benefits of eating fresh, homemade bread far outweigh the commercial alternatives. Store-bought options often contain preservatives and additives, whereas your homemade loaf is simple and completely customizable.
Imagine waking up to the aroma of freshly baked bread wafting through your kitchen. According to the Whole Grains Council, baking your own bread ensures that you can use high-quality ingredients, monitor the nutritional content, and avoid unnecessary additives. Plus, it’s a fantastic way to unwind after a hectic day. Why not try incorporating this delightful culinary activity into your weekly routine and experience the joy of baking? Your taste buds—and wallet—will thank you.
Are you ready to dive into the world of easy no knead artisan bread? Let’s get started!
Ingredients for Easy No Knead Artisan Bread
What you need for a delicious loaf
Making easy no knead artisan bread is a breeze with just a few simple ingredients, and trust me, the results are phenomenal. Here’s what you’ll need to whip up your own crusty masterpiece:
- 3 cups all-purpose flour: This is the backbone of your bread, providing structure and texture.
- 1 ½ teaspoons salt: Salt elevates the flavor and strengthens the dough, ensuring a tastier loaf.
- ½ teaspoon instant yeast: This is your leavening agent, which helps the bread rise beautifully without any fuss.
- 1 ½ cups warm water (about 110°F): The warm water activates the yeast, crucial for that delightful rise.
The beauty of this recipe lies in its simplicity. You don’t need fancy equipment—just mix, let it rest, and bake! By keeping it uncomplicated, you can focus on enjoying the process. If you’re looking for alternatives, check out King Arthur Baking for some great tips and flour products. Happy baking!
Step-by-step Preparation of Easy No Knead Artisan Bread
Creating your own easy no knead artisan bread at home is simpler than you might think! Follow these steps to enjoy a crusty, warm loaf that fills your kitchen with the delightful aroma of fresh bread.
Combine the dry ingredients
To start this journey, grab a large mixing bowl. Add 3 cups of all-purpose flour, 1 ½ teaspoons of salt, and ½ teaspoon of instant yeast. It’s important to mix these dry ingredients well to ensure even yeast distribution. A simple whisk works wonders here. This step sets a solid foundation for your artisan bread.
Mix in warm water to form the dough
Next, slowly add 1 ½ cups of warm water (ideally around 110°F) to your dry mix. Use a wooden spoon or your hands to combine everything until a sticky dough forms. Don’t worry about achieving a perfectly smooth texture; the magic of no knead bread is its rustic finish!
Let the dough rise
Now comes the waiting game! Cover your bowl with plastic wrap or a kitchen towel and let it rest at room temperature for about 12-18 hours. This long fermentation time develops fantastic flavor and creates those lovely air bubbles in the dough. If you can’t wait, might I suggest listening to a podcast or binge-watching a new series while you wait?
Preheat the oven and prepare the Dutch oven
About 30 minutes before you plan to bake, preheat your oven to 450°F, placing your Dutch oven inside as it heats. Heating the Dutch oven ensures a perfect environment for your easy no knead artisan bread to rise and create a crusty exterior.
Shape the dough into a round loaf
Once the dough has risen and doubled in size, turn it out onto a floured surface. Gently shape the dough into a round loaf. The key here is to handle it with care so those air pockets remain intact! This is your moment to feel like a true artisan baker.
Rest the shaped loaf before baking
Place your shaped loaf on a piece of parchment paper and let it rest for an additional 30 minutes. This allows the gluten to relax, which can make for a lovely, airy texture when baked.
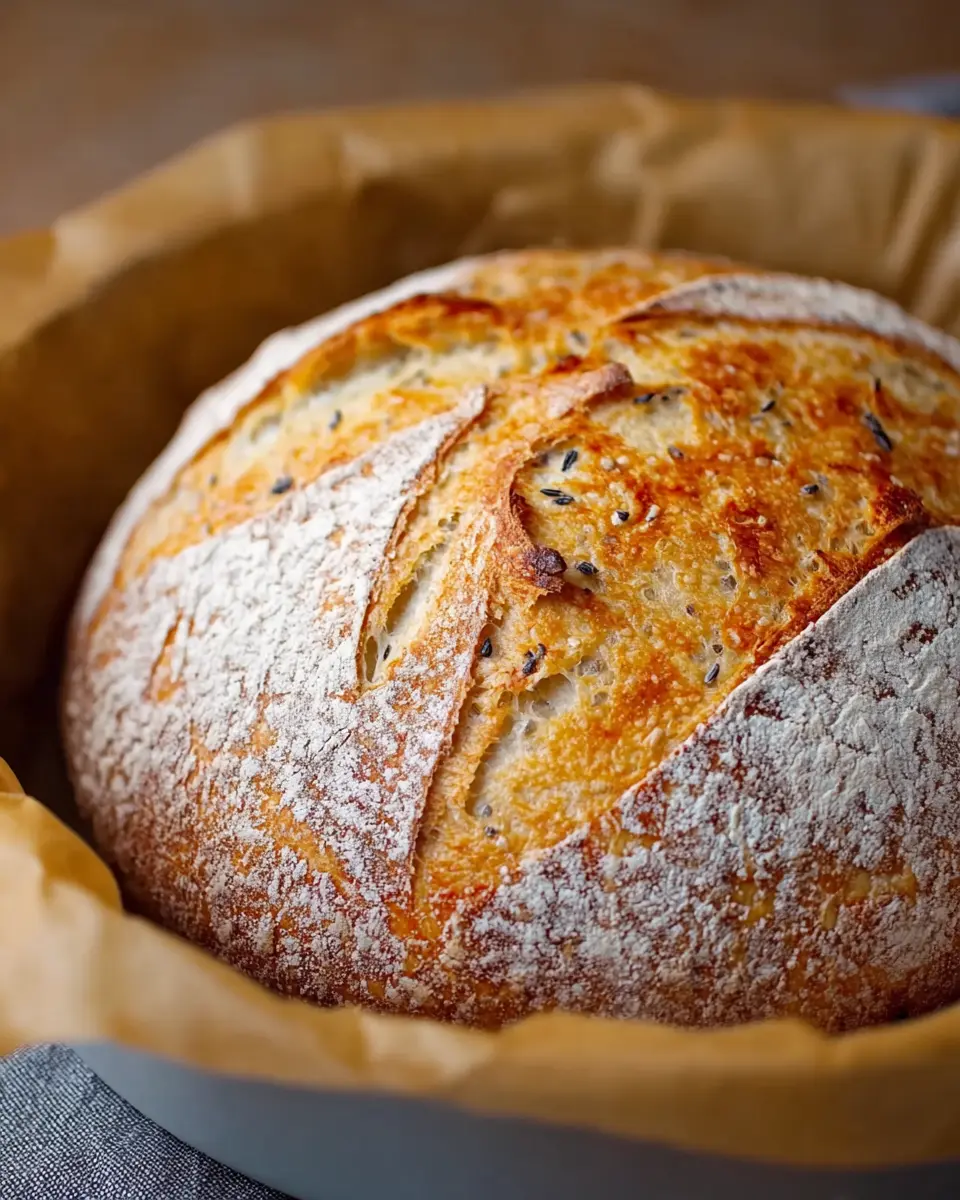
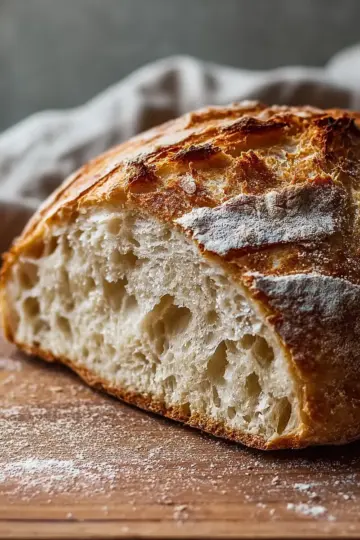
Bake with the lid on for a crusty finish
After the rest, carefully transfer the loaf, along with the parchment, into the hot Dutch oven and cover it with the lid. Bake for 30 minutes; this step traps steam, contributing to the crusty finish we all crave in a good artisan bread.
Bake uncovered for golden perfection
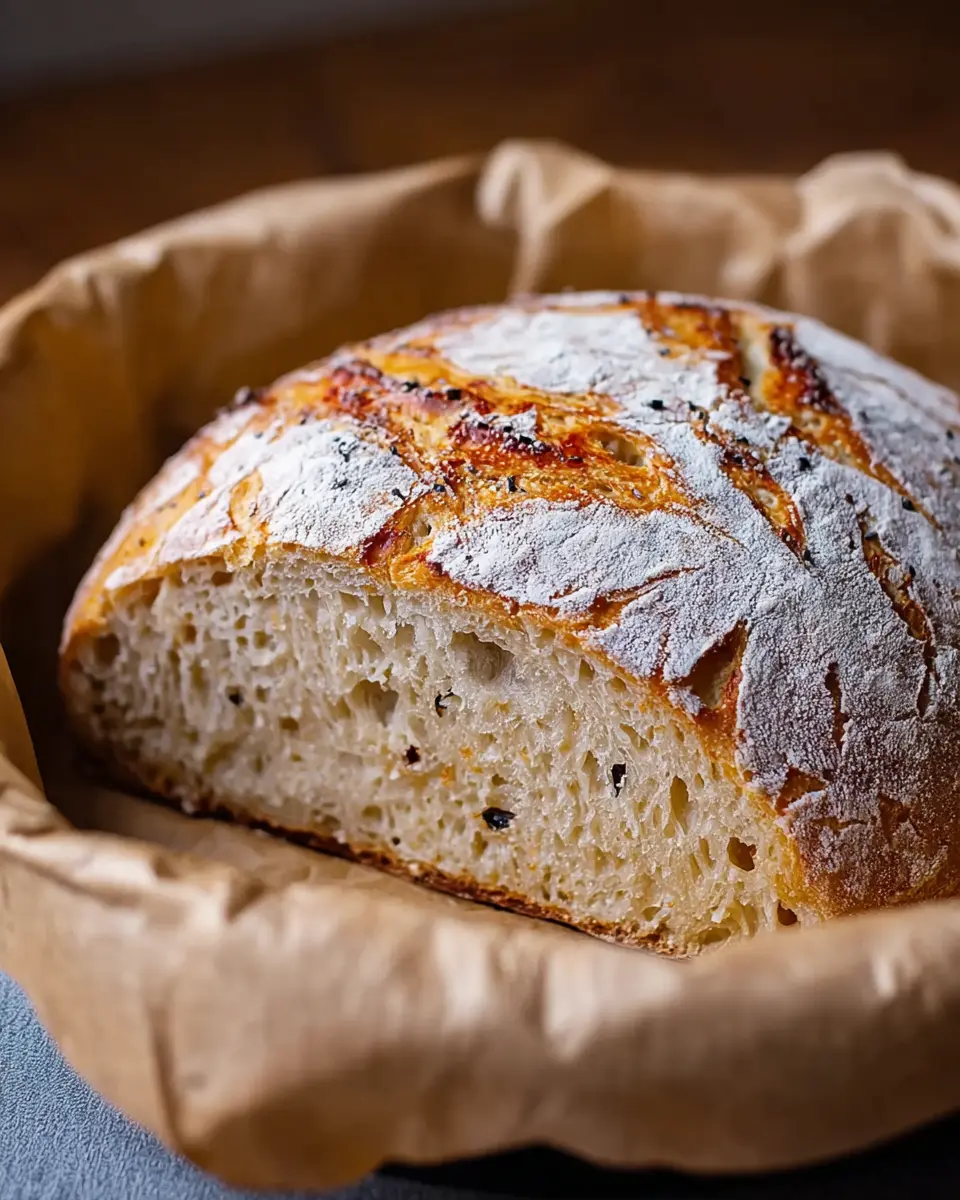
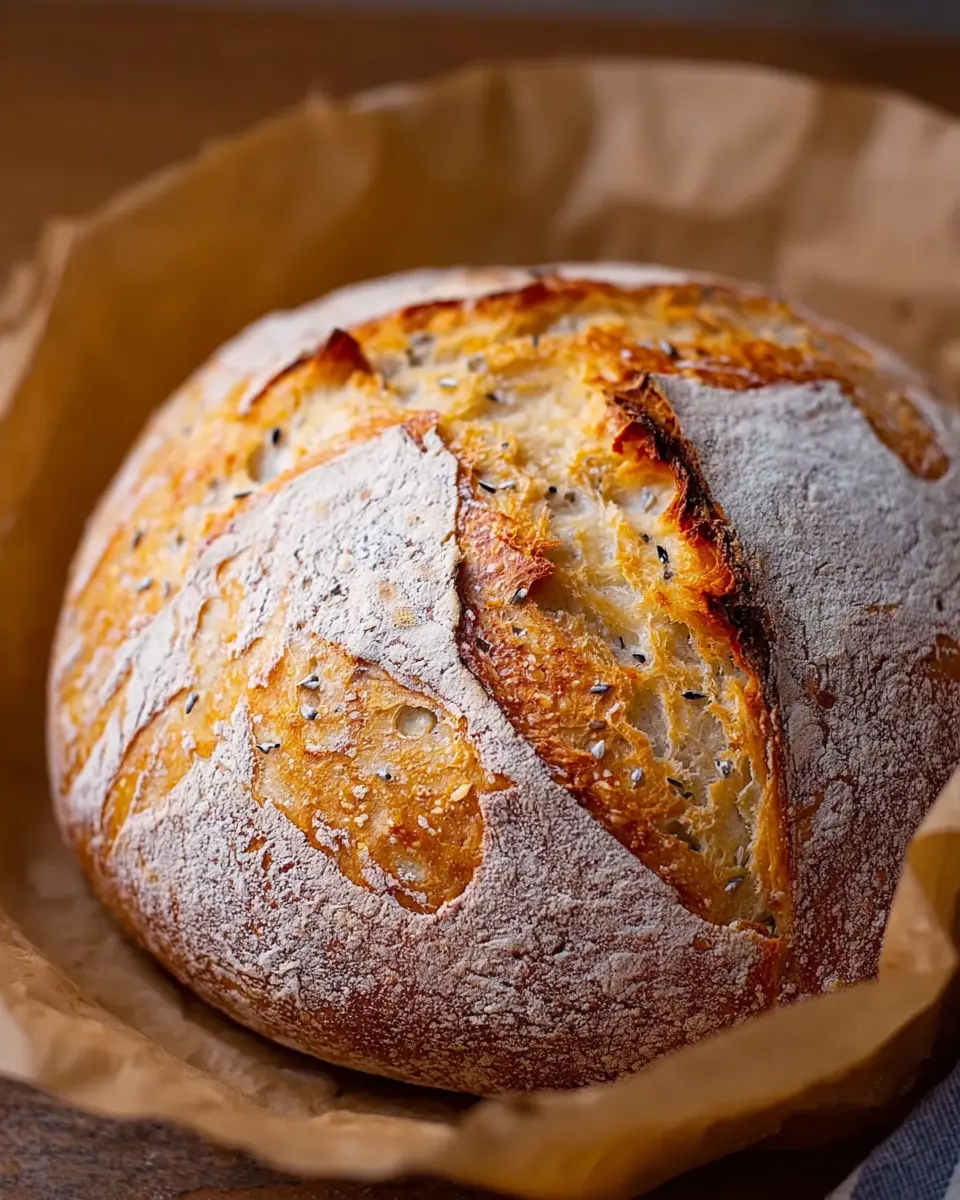
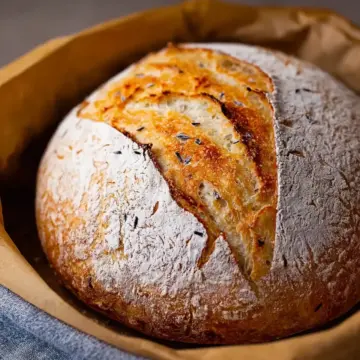
Finally, remove the lid and bake for another 15-20 minutes until your loaf boasts a gorgeous golden-brown crust. Don’t be surprised if your kitchen fills with the enchanting aroma of freshly baked bread. I mean, who wouldn’t want to have that wafting through their living space?
Let it cool on a wire rack for at least 30 minutes before slicing. Trust me; patience is key! Enjoy the fruits of your labor with some olive oil or paired with your favorite soup. Happy baking!
For more artisan bread tips, check out resources like the King Arthur Baking Company for expert advice and recipes!
Variations on Easy No Knead Artisan Bread
Baking an easy no knead artisan bread opens the door to delightful variations that will elevate your bread-making game. Here are a few creative twists you can try.
Herb-infused artisan bread
Add a burst of flavor by mixing in your favorite herbs such as rosemary, thyme, or basil. Simply stir in 2-3 tablespoons of dried herbs into the flour mixture before adding water. This vibrant touch will turn your loaf into a fragrant accompaniment for soups and salads.
Cheese-studded artisan bread
Imagine the joy of biting into warm, gooey cheese amid the crusty bread. Shred about one cup of cheese—like cheddar or mozzarella—into the dough right after mixing in the water.
Whole grain artisan bread
For a heartier option, substitute half of the all-purpose flour with whole wheat flour. This adds a delightful nuttiness and boosts fiber content. Not only will this make for nutritious bread, but you'll also enjoy a more rustic flavor profile.
Experiment with these variations, and don’t hesitate to mix and match ingredients or explore new flavors. Your kitchen will be filled with joy as you perfect your own easy no knead artisan bread recipe!
For additional tips on infusing flavors into your bread, consider checking out the resources on Serious Eats or Bon Appétit.
Cooking Tips and Notes for Easy No Knead Artisan Bread
Troubleshooting Common Issues
If your easy no knead artisan bread doesn’t rise as expected, consider the yeast's freshness. Instant yeast can lose potency over time. Also, ensure that your water temperature is just right—too hot can kill the yeast, while too cold might not activate it effectively. If your crust isn’t crispy, try baking it longer or using a thermometer to ensure your oven reaches the proper temperature.
Essential Tools for Success
Having the right tools can streamline your bread-making experience. A heavy Dutch oven is crucial for creating that perfect crust by trapping steam. Additionally, a mixing bowl, a spatula for folding, and parchment paper make handling the dough much easier. You might also find a kitchen scale helpful for precise measurements.
Importance of Patience in Bread-Making
Bread-making requires a touch of patience, especially with this easy no knead artisan bread recipe. Allowing the dough to rest and rise contributes to its flavor and texture. Rushing the process often leads to dense bread. Remember, good things come to those who wait, and homemade bread is definitely worth it! Embrace the wait and enjoy the aromatic rewards once it's out of the oven.
For more in-depth troubleshooting tips, you can check out King Arthur Baking's Guide. Happy baking!
Serving Suggestions for Easy No Knead Artisan Bread
Pairings with Homemade Soups
Imagine cozying up with a bowl of your favorite homemade soup and a warm slice of easy no knead artisan bread. The crusty exterior and soft inside create the perfect complement to hearty soups like tomato basil or butternut squash. Just dip, scoop, and savor! You could even try blending flavors with a chicken noodle soup for an unforgettable meal.
Serving with Charcuterie Boards
Transform your artisan bread into the star of your next charcuterie board. Slice it up and pair it with a delightful assortment of cheeses, turkey bacon, and beef salami. Add fresh fruits and nuts for a colorful, appetizing spread that’ll impress your guests. This combo not only looks beautiful but offers a variety of tastes and textures.
Enjoying with Flavored Oils and Dips
Another fantastic way to enjoy your easy no knead artisan bread is by serving it with flavored oils and dips. Consider a rich olive oil infused with herbs or a zesty balsamic vinegar for a simple, yet sophisticated snack. You might even explore recipes for homemade dips like herb hummus or a creamy spinach dip. With every bite, you’ll elevate your artisan bread experience!
Time Breakdown for Easy No Knead Artisan Bread
Preparation Time
The prep work for this easy no knead artisan bread is a breeze! Set aside about 15 minutes to gather your ingredients and mix everything together. It’s as simple as stirring flour, salt, yeast, and warm water in a bowl—no fancy equipment needed!
Rising Time
Now comes the magic! The dough needs to rise for 12 to 18 hours at room temperature. This long fermentation is what gives your bread that delightful, airy texture and complex flavor. Just imagine waking up to the smell of fresh bread in the morning—pure bliss!
Baking Time
When you're ready to bake, preheat your oven (with the Dutch oven inside) for about 30 minutes, then bake the bread for 30 to 40 minutes. You’ll want a perfect golden crust to make this loaf visually irresistible.
Total Time
In total, you’re looking at about 13 to 19 hours from start to finish, but don’t let that overwhelm you! Most of this time is hands-off, giving you plenty of opportunity to enjoy your day while the bread works its magic.
For more tips on making the perfect loaf, check out this guide on The Science of Bread Making. Happy baking!
Nutritional Facts for Easy No Knead Artisan Bread
Calories per serving
Each serving of this easy no knead artisan bread contains approximately 130 calories, making it a somewhat light option when considering your daily intake. Perfect for pairing with meals or enjoying a slice with your favorite toppings.
Macronutrients breakdown
In one serving, you’ll find about:
- Carbohydrates: 28g
- Protein: 4g
- Fat: 0.5g
This simple bread offers a great carbohydrate source ideal for energy, complemented by a modest amount of protein.
Dietary considerations
This easy no knead artisan bread is vegetarian-friendly, and with slight modifications, it can cater to vegan diets too! Enjoy it alongside wholesome spreads like hummus or avocado for a nutritious snack. If gluten-free options are on your radar, consider using alternative flours—just remember the texture and flavor might vary.
For more detailed nutrition insights, check out Nutrition.gov to explore how different ingredients impact your health!
FAQs about Easy No Knead Artisan Bread
Can I use other types of flour?
Absolutely! While the recipe calls for all-purpose flour, you can experiment with other flours like whole wheat, rye, or spelt. Just keep in mind that different flours absorb water differently. You might need to adjust the amount of water slightly or give the dough a little extra time to rise. For more insights on different flours, check out the King Arthur Baking website.
What if I don't have a Dutch oven?
No worries! If you don’t have a Dutch oven, you can use any oven-safe pot with a lid. Alternatively, try a baking stone or even a cast-iron skillet with a lid. Just ensure it can handle high temperatures. To create steam, place a shallow pan filled with water at the bottom of your oven while baking.
How do I store leftover bread?
To keep your easy no knead artisan bread fresh, wrap it in a kitchen towel and store it at room temperature for up to three days. If you want to preserve it for a longer time, slice and freeze it in an airtight bag. This way, you can quickly toast or reheat slices whenever you crave that fresh-baked goodness!
Conclusion on Easy No Knead Artisan Bread
Baking easy no knead artisan bread at home can truly spark joy. The delightful aroma wafting through your kitchen is just the beginning. Enjoy experimenting with different toppings or add-ins, such as herbs or cheese. Remember, each loaf is a canvas—so have fun with it and embrace the process!
Emphasizing the Joy of Homemade Baking and Experimentation
Engaging in homemade baking is more than preparing food; it’s a creative outlet that brings people together. Whether you're hosting a cozy dinner or simply enjoying a quiet evening, freshly baked bread elevates any occasion. The beauty of no knead artisan bread lies in its adaptability.
-
Try New Flavors: Don't hesitate to experiment with ingredients. Add olives, sun-dried tomatoes, or rosemary for unique flavors. You can discover a personal favorite!
-
Share Your Creations: Invite friends or family over for a tasting party. Sharing your homemade bread can lead to delightful conversations and memorable moments.
For more inspiration on homemade baking, check out resources like King Arthur Baking Company and The Bread Lab for tips and innovative recipes.
Baking is not just about nurturing your palate; it's about nourishing your spirit. So grab those ingredients and take pleasure in the journey of creating your very own easy no knead artisan bread. Your culinary adventure awaits!
Easy No Knead Artisan Bread
Equipment
- Dutch oven
- Mixing bowl
- parchment paper
Ingredients
Dry Ingredients
- 3 cups all-purpose flour
- 1.5 teaspoons salt
- 0.5 teaspoon instant yeast
Wet Ingredients
- 1.5 cups warm water about 110°F
Instructions
Bread Preparation
- In a large mixing bowl, combine flour, salt, and instant yeast. Stir until mixed.
- Gradually add warm water and mix until a sticky dough forms.
- Cover the bowl with plastic wrap or a kitchen towel and let it rise at room temperature for 12-18 hours until bubbly and doubled in size.
- Preheat the oven to 450°F with the Dutch oven inside for about 30 minutes.
- Turn the dough onto a floured surface and shape it gently into a round loaf.
- Place the dough on parchment paper and let it rest for an additional 30 minutes.
- Carefully transfer the dough into the hot Dutch oven, cover it with the lid, and bake for 30 minutes.
- Remove the lid and bake for another 15-20 minutes until golden brown.
- Allow cooling on a wire rack for at least 30 minutes before slicing.


Leave a Reply