
Introduction to Salmon Sushi Bake
What is a Salmon Sushi Bake?
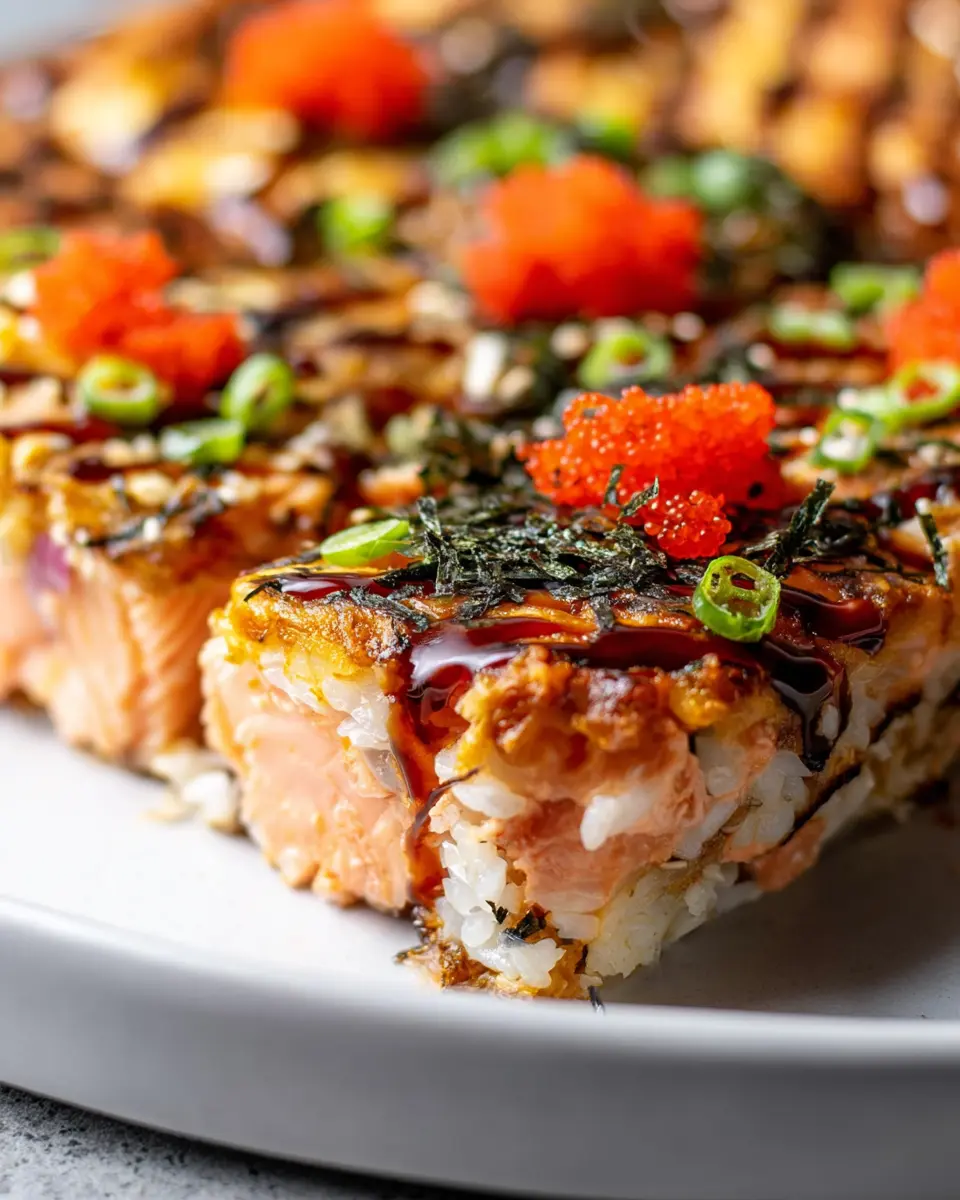
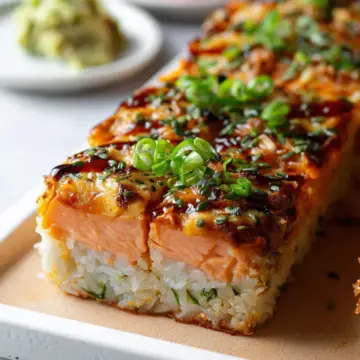
If you’re looking to impress your friends or family with a fun and unique twist on traditional sushi, the salmon sushi bake is your answer! This crowd-pleaser combines all the beloved elements of sushi into one delicious dish that’s as easy to prepare as it is to enjoy. Picture layers of fluffy sushi rice, creamy cream cheese, savory salmon, and crispy nori, all baked together for a delightful fusion of flavors and textures.
Originating from the creative home chefs in the U.S., the salmon sushi bake transforms the intricate sushi roll into a hassle-free casserole-style meal that is perfect for gatherings or cozy nights in. In just under an hour, you'll go from kitchen novice to sushi rockstar, and the best part is, it’s customizable! Add your favorite toppings like green onions, sliced jalapeños, or even avocado to personalize each piece.
For a recipe that’s sure to be a hit, keep reading to learn how to whip up your own salmon sushi bake that will have everyone asking for seconds. Ready to dive in? Let’s get started!
Ingredients for Salmon Sushi Bake
Creating a mouthwatering salmon sushi bake is all about the right ingredients. Let’s break down what you’ll need to bring this flavorful dish to life!
-
Salmon: Start with 1½ to 2 pounds of wild sockeye salmon fillet. This fish is known for its rich flavor and vibrant color. Catch it fresh from your local market or grocery store for the best taste.
-
Sticky Rice: You'll need 32 ounces of ready-made cooked sticky rice or 3 cups of dried sushi rice. The sticky texture is key to holding your bake together!
-
Nori Sheets: Grab 2-3 nori sheets to add that authentic sushi flavor we love.
-
Cream Cheese: Using 16 ounces of softened cream cheese creates a creamy layer that balances the dish beautifully.
-
Sriracha Mayonnaise: Add ½ cup for a spicy kick.
-
Sauces and Seasonings: Don’t forget the ½ cup of chopped green onions, 3 tablespoons of eel sauce (or oyster sauce), and 1-2 tablespoons of furikake rice seasoning for that extra flair.
-
Garnishes: Optional toppings like sliced radish, cucumbers, jalapeño, and pickled ginger can spice it up and offer a fresh crunch!
With these ingredients on hand, you're ready to enjoy a delicious twist on your favorite sushi!
Preparing Salmon Sushi Bake
Preheat and Prepare the Baking Sheet
First things first, let’s get our kitchen ready! Preheat your oven to 400°F (204°C). While that’s warming up, grab a large rimmed baking sheet and line it with parchment paper. This will make it easier to clean up later and prevent the salmon from sticking. Once you have the parchment in place, lay your salmon fillet right on top and drizzle it with 2 tablespoons of soy sauce. This step infuses the fish with flavor, making your salmon sushi bake even tastier!
Bake the Salmon Fillet
Slide the salmon into your preheated oven and bake for about 15 minutes. You’ll know it’s done when it flakes easily with a fork and is fully cooked through. Once baked, let it cool for a bit while you prepare the other components. Just a heads-up, the temptation to munch on it straight out of the oven is strong, but trust me, bacon cravings are a thing too!
Prepare the Sushi Rice Layer
As the salmon bakes, focus on the sushi rice layer. Grab a 9 x 13-inch baking dish and give it a light spray of nonstick cooking spray for good measure. Dump in your cooked sushi rice (32 ounces or about 3 cups of dried sushi rice cooked), adding 2 tablespoons of rice vinegar to give it that sushi flair. Mix everything by hand, then press it down firmly into an even layer at the bottom of the dish. The layer should be smooth and compact, providing a sturdy base for your sushi bake.
Layer the Nori Sheets
Next up, we’re adding the nori. Lay out 2-3 nori sheets over the top of your sushi rice. If they hang off the edges a bit, feel free to trim them with scissors for a perfect fit that covers the rice entirely. This seaweed will bring that authentic sushi flavor that’s simply irresistible!
Spread the Cream Cheese
Now, let’s add a creamy element. Take your softened cream cheese and spread it gently over the nori sheets. Using a flat frosting spreader works like a charm for this, helping you achieve an even layer without tearing the nori beneath. This creamy delight adds richness to your salmon sushi bake that you won't want to skip.
Mix and Layer the Salmon with Sriracha Mayo
With the salmon cooled, it’s time for a little mixing magic. Remove the skin from the salmon and flake it into a mixing bowl, discarding any unwanted bits. Stir in ½ cup of sriracha mayonnaise until everything is well combined. This adds a spicy kick that elevates the flavors. Gently spread this salmon and mayo mixture over the cream cheese layer, ensuring it’s evenly distributed.
Bake the Sushi Bake
Now comes the moment of truth! Place your sushi bake in the oven and bake for 10 to 15 minutes. You’ll want it to set nicely and get a bit golden on top. The smell wafting through your kitchen during this time is simply heavenly!
Cool and Cut for Serving
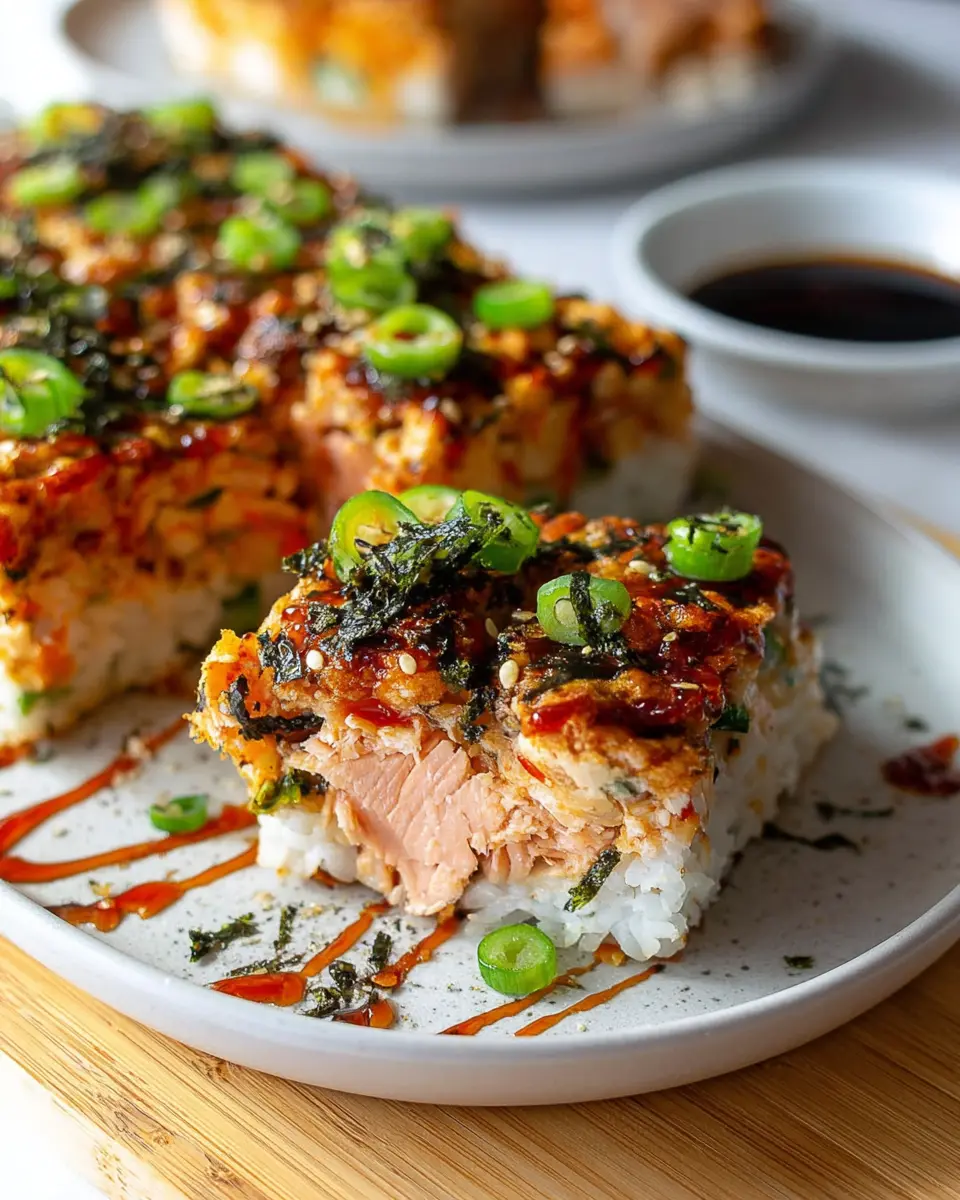
Once baked, remove the dish from the oven and allow it to cool for about 10 minutes. If you prefer it cold (as many do), feel free to refrigerate until chilled before cutting. Slice your creation into 12 to 24 pieces. For that finishing touch, sprinkle some furikake rice seasoning over the top and drizzle eel sauce for added flavor. Whether served warm or chilled, you’ll want to top each piece with crispy garnishes like cucumber or radish for that delightful crunch.
Enjoy your delicious salmon sushi bake with friends or keep it all to yourself—no judgment here!
Variations on Salmon Sushi Bake
Spicy Tuna Sushi Bake
If you're a fan of spicy flavors, a Spicy Tuna Sushi Bake is a delightful twist on the classic salmon version. To make it, simply replace the salmon with fresh sushi-grade tuna. Mix it with a spicy mayo, like sriracha blended with mayo, and layer it just as you would with the salmon. The result is a creamy, flavorful dish that's sure to tantalize your taste buds! This version is perfect for those who enjoy a kick in their meals. Check out more tips on preparing sushi at Serious Eats.
Vegetarian Sushi Bake
For a vegetarian option, a Vegetarian Sushi Bake can be just as satisfying. Substitute the seafood with roasted vegetables like zucchini, bell peppers, or even sweet potatoes. You can also add layers of creamy avocado and a vegan cream cheese alternative to maintain that rich texture. This dish is not only colorful but also packed with nutrients, allowing you to enjoy sushi flavors without any fish. Try exploring additional veggie options at Minimalist Baker.
Cooking Tips and Notes for Salmon Sushi Bake
Creating the perfect salmon sushi bake involves a few little tricks to enhance the flavors.
-
Fresh Salmon: Opt for wild sockeye salmon for the best flavor and texture. Feel free to marinate it for an hour in soy sauce for an extra kick.
-
Rice Variety: If using dried sushi rice, ensure to rinse it well before cooking to achieve the tender, sticky consistency that holds everything together.
-
Layering: Press the rice firmly into the dish to form a solid base; this helps the toppings adhere better when baked.
-
Serving Temperature: This dish can be enjoyed cold or at room temperature, making it great for gatherings.
Don’t forget to garnish with fresh veggies like radishes or cucumbers for added crunch and visual appeal! For more guidance on preparing sushi ingredients, check out these sushi tips.

Serving Suggestions for Salmon Sushi Bake
Serving your salmon sushi bake is all about enhancing the flavors and creating a delightful presentation. Here are some tasty ideas:
-
Fresh Garnishes: Top each piece with thin slices of radish, cucumber, or jalapeño for a refreshing crunch. Avocado also makes a creamy addition.
-
Drizzle of Sauces: Consider a drizzle of eel sauce or extra sriracha mayonnaise for added flavor.
-
Accompanying Sides: Serve with pickled ginger and a side of soy sauce for dipping. These components bring a traditional sushi vibe that pairs beautifully with your bake.
-
Temperature Play: While delicious at any temperature, many enjoy their salmon sushi bake cold or at room temperature for the best taste experience.
Enjoy experimenting with these serving ideas; they can elevate your dish to new heights!
Time Breakdown for Salmon Sushi Bake
Preparation Time
Getting everything ready takes about 30 minutes. Assemble your ingredients, preheat the oven, and prepare the baking dish to set yourself up for success.
Cooking Time
The baking itself takes about 25 minutes. This includes roasting the salmon and finishing the sushi bake in the oven. You’ll love how everything melds together!
Total Time
In just 55 minutes, you’ll have a delicious Salmon Sushi Bake ready to serve, perfect for gatherings or a cozy night in. Don't forget to garnish it for that extra flair!
Nutritional Facts for Salmon Sushi Bake
Calories
One serving of salmon sushi bake contains approximately 325 calories. This makes it a delicious option for both a satisfying meal and a savory appetizer without going overboard on your calorie intake.
Protein
Packed with 17 grams of protein, this dish is a fantastic source of nutrition, supporting muscle growth and recovery. Combining the wholesome salmon and creamy layers ensures you're not just indulging, but also nourishing your body.
Sodium
Keep an eye on your sodium intake, as one serving includes 511 milligrams of sodium. If you're watching your salt intake, simply reduce the amount of soy sauce or choose low-sodium alternatives for a healthier twist.
FAQs about Salmon Sushi Bake
Can I make the sushi bake ahead of time?
Absolutely! You can prepare your salmon sushi bake in advance. Just assemble it, cover it tightly with plastic wrap or aluminum foil, and refrigerate for up to 24 hours before baking. When you're ready, simply pop it in the oven as directed. This makes it a fantastic option for meal prepping or entertaining!
What can I substitute for cream cheese?
If you're looking for a lighter alternative, there are several options! For a dairy-free swap, consider using vegan cream cheese or mashed avocado for creamy texture. If you're also avoiding dairy, cottage cheese blended until smooth can work well, too. This way, you can enjoy the deliciousness of your salmon sushi bake without compromising on taste!
How can I customize the toppings?
Customization is the key to making your salmon sushi bake uniquely yours! Try adding:
- Chopped vegetables: Cucumber, edamame, or carrots for crunch.
- Spices: A sprinkle of sesame seeds or chili flakes for a kick.
- Herbs: Fresh cilantro or parsley for a pop of flavor.
- Sauces: Drizzle additional sriracha mayo or eel sauce on top before serving.
Feel free to get creative and elevate your dish to match your personal taste!
Conclusion on Salmon Sushi Bake
The salmon sushi bake is not just a meal; it's an experience that brings friends and family together. With its delightful layers and fresh garnishes, it's sure to satisfy everyone's taste buds. Try this easy, crowd-pleasing recipe for your next gathering, and enjoy the compliments that follow!
Salmon Sushi Bake
Equipment
- baking sheet
- 9 x 13-inch baking dish
- Mixing bowl
- frosting spreader
Ingredients
- 1.5 pounds wild sockeye salmon filet or 2 pounds
- 2 tablespoons soy sauce
- 32 ounces ready-made cooked sticky rice or 3 cups dried sushi rice, cooked according to package
- 2 tablespoons rice vinegar
- 2-3 sheets nori
- 16 ounces cream cheese softened to room temperature
- 0.5 cup sriracha mayonnaise
- 0.5 cup chopped green onions
- 3 tablespoons eel sauce or oyster sauce
- 1-2 tablespoons furikake rice seasoning
- thinly sliced optional garnishes radish, cucumbers, jalapeno, avocado, and/or pickled ginger
Instructions
- Preheat the oven to 400°F. Lay out a large rimmed baking sheet and line it with parchment paper. Place the salmon fillet on the parchment paper and drizzle 2 tablespoons of soy sauce over the top.
- Bake the salmon for 15 minutes until cooked through, then cool.
- While the salmon is baking, set out a 9 x 13-inch baking dish, and spray with nonstick cooking spray. Dump the cooked rice into the baking dish and drizzle with 2 tablespoons of rice vinegar. Toss the rice by hand and then press it firmly into an even layer in the bottom of the dish.
- Next lay the Nori sheets over the top of the rice. If needed, cut them with scissors to fit them evenly over the entire surface of the rice.
- Gently spread the softened cream cheese over the entire surface of the Nori sheets. Use a large flat frosting spreader to spread the cream cheese in an even layer.
- Once the salmon comes out of the oven, set out a mixing bowl. Remove the skins and discard. Then crumble the cooked salmon into the mixing bowl. Add the sriracha mayo, and mix the salmon and mayo together until well combined. Spread the salmon mixture over the top of the cream cheese mixture in an even layer.
- Place the sushi bake in the oven and bake for 10 to 15 minutes until the salmon layer is well set.
- Remove from the oven and cool for at least 10 minutes before cutting. Or refrigerate until cold and then cut.
- When ready to serve, cut the sushi bake into 12 to 24 pieces. Sprinkle the tops with furikake rice seasoning. Then drizzle eel sauce over the top of each piece and sprinkle with scallions.
- Feel free to add extra fresh and crunchy garnishes! Here we added a thin slice of cucumber, radish, and jalapeño on top!


Leave a Reply