
Introduction to No-Bake Raspberry Cheesecake Bars
If you’re a busy young professional, juggling work, social obligations, and personal time, finding the perfect dessert that won’t eat into your precious hours can feel like a tall order. Luckily, no-bake desserts are here to save the day! They’re simple, time-efficient, and require minimal kitchen skills. This is where our delicious No-Bake Raspberry Cheesecake Bars come into play—a delightful treat that combines the creamy goodness of cheesecake with the vibrant zing of raspberries, all without the hassle of baking.
Imagine this: after a long day at the office, the last thing you want to do is preheat the oven and wait for a cake to bake. No worries; with these bars, you can whip them up in just about 30 minutes, pop them in the fridge, and voilà! You’ve got a delectable dessert ready to impress your friends at your next gathering or simply to indulge in yourself while binge-watching your favorite series.
Plus, the bright and fresh flavor of raspberries not only elevates the taste but also adds a beautiful pop of color, making your dessert both a feast for the eyes and the palate. For more light and delightful recipes, check out sources like Food Network for inspiration!
Ingredients for No-Bake Raspberry Cheesecake Bars
For the crust:
Creating a delicious base for your no-bake raspberry cheesecake bars begins with just a few simple ingredients. You'll need:
- Nonstick cooking spray
- 18 graham cracker sheets - these give a wonderful crunch and flavor!
- ⅓ cup granulated sugar - this adds just the right touch of sweetness.
- 12 tbsp. (1½ sticks) salted butter, melted - essential for binding the crust and adding rich flavor.
For the filling:
The star of the show is, of course, the creamy filling! Gather these ingredients:
- 16 oz. cream cheese, softened - make sure it's at room temperature for easy mixing.
- 2 cups vanilla yogurt (Greek or regular) - this adds a delightful tang and creaminess.
- 1 cup powdered sugar - for a touch of sweetness that balances the tartness of the raspberries.
- 1 tbsp. vanilla extract - enhances the overall flavor profile.
- 1 (8-ounce) container frozen whipped topping (such as Cool Whip), thawed - gives the cheesecake a light texture.
- ⅓ cup raspberry preserves - brings that fruity goodness into every bite.
- 20 raspberries - fresh is best for garnish and extra flavor.
Now that you have your ingredients ready, you’re all set to whip up these delightful bars! Happy baking!
Preparing No-Bake Raspberry Cheesecake Bars
Ready to indulge in a slice of summer bliss? Making these no-bake raspberry cheesecake bars is a breeze, and you’ll impress friends and family with your culinary skills—without even turning on the oven! Follow these easy steps to whip up a delightful dessert that’s perfect for any occasion.
Step 1: Prepare the crust
Start by lining a 9-by-13-inch baking pan with parchment paper, leaving some overhang along the longer sides for easy removal later. A quick spritz of nonstick cooking spray ensures nothing will stick!
- Put 18 graham cracker sheets in a zip-top bag and crush them into fine crumbs using a rolling pin (aim for about 3 cups).
- In a large bowl, combine the cracker crumbs with ⅓ cup of granulated sugar and 12 tablespoons of melted salted butter. Mix until it resembles wet sand.
- Press the crumb mixture evenly and firmly into the bottom of your prepared pan. Set this aside while you move on to the filling.
Step 2: Create the filling
Let’s make that creamy, dreamy filling! In a blender, combine 16 ounces of softened cream cheese, 2 cups of your choice of vanilla yogurt (Greek or regular work beautifully), 1 cup of powdered sugar, and 1 tablespoon of vanilla extract. Blend until smooth and creamy.
Once blended, transfer this luscious mixture to a large bowl and gently fold in one 8-ounce container of thawed frozen whipped topping, like Cool Whip.
Step 3: Assemble the cheesecake bars
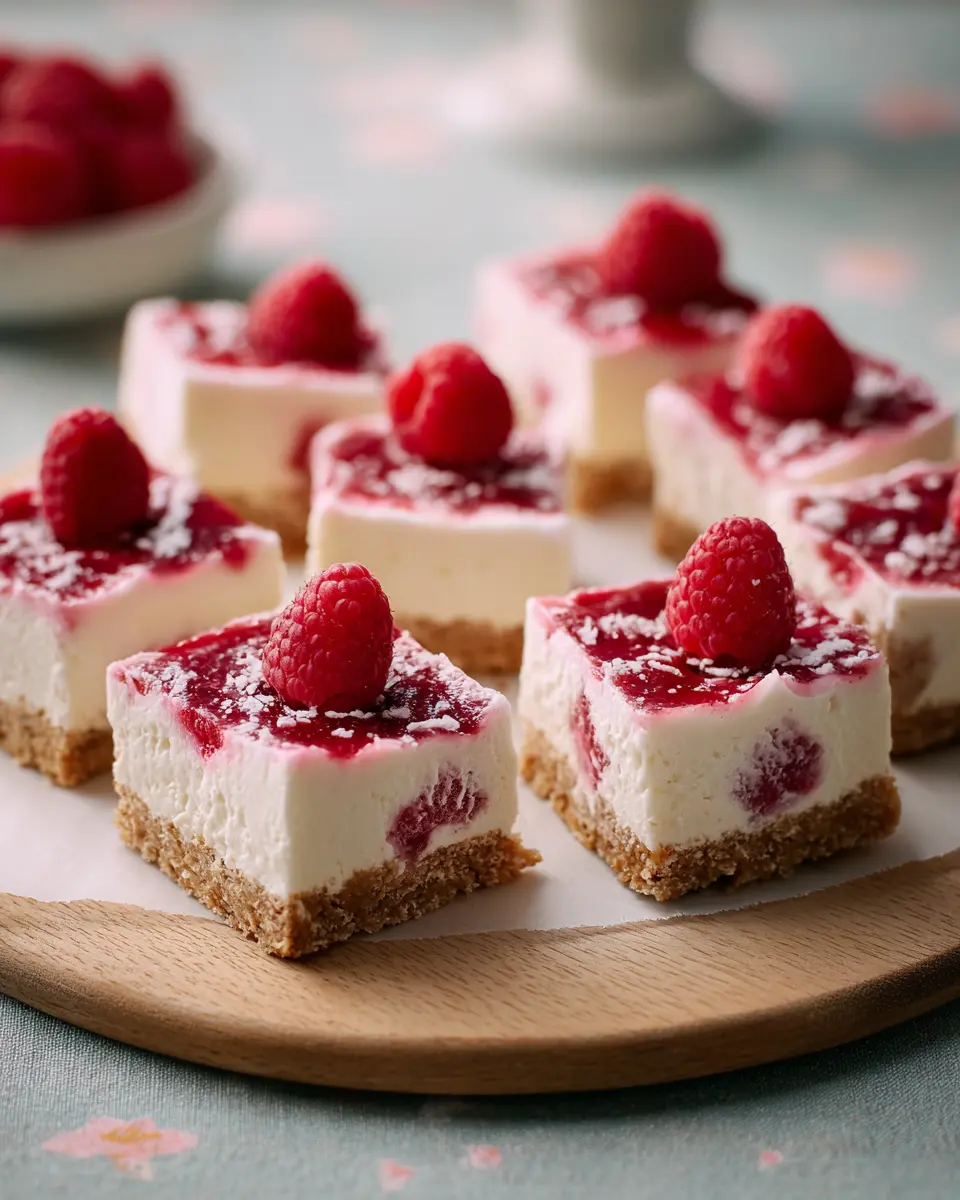
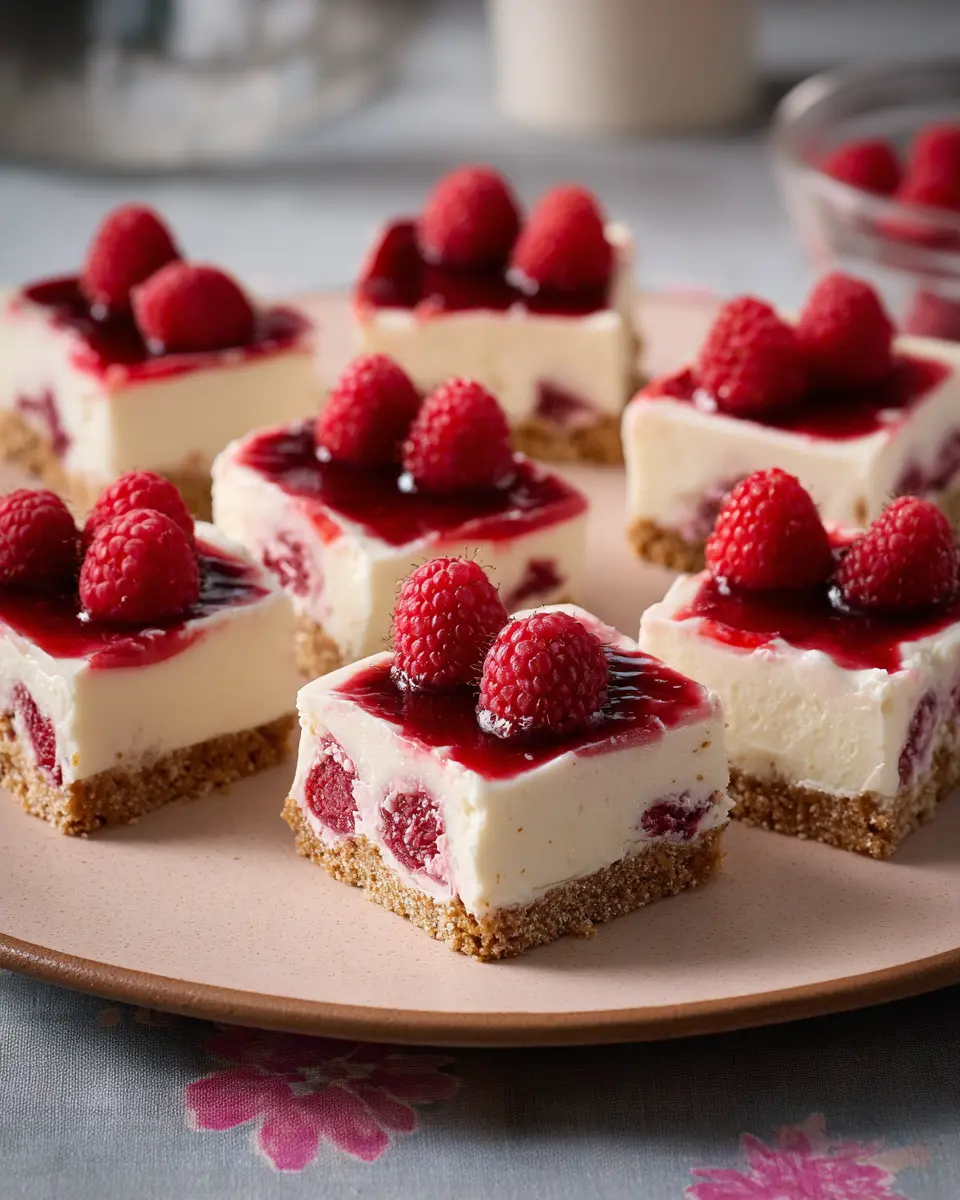
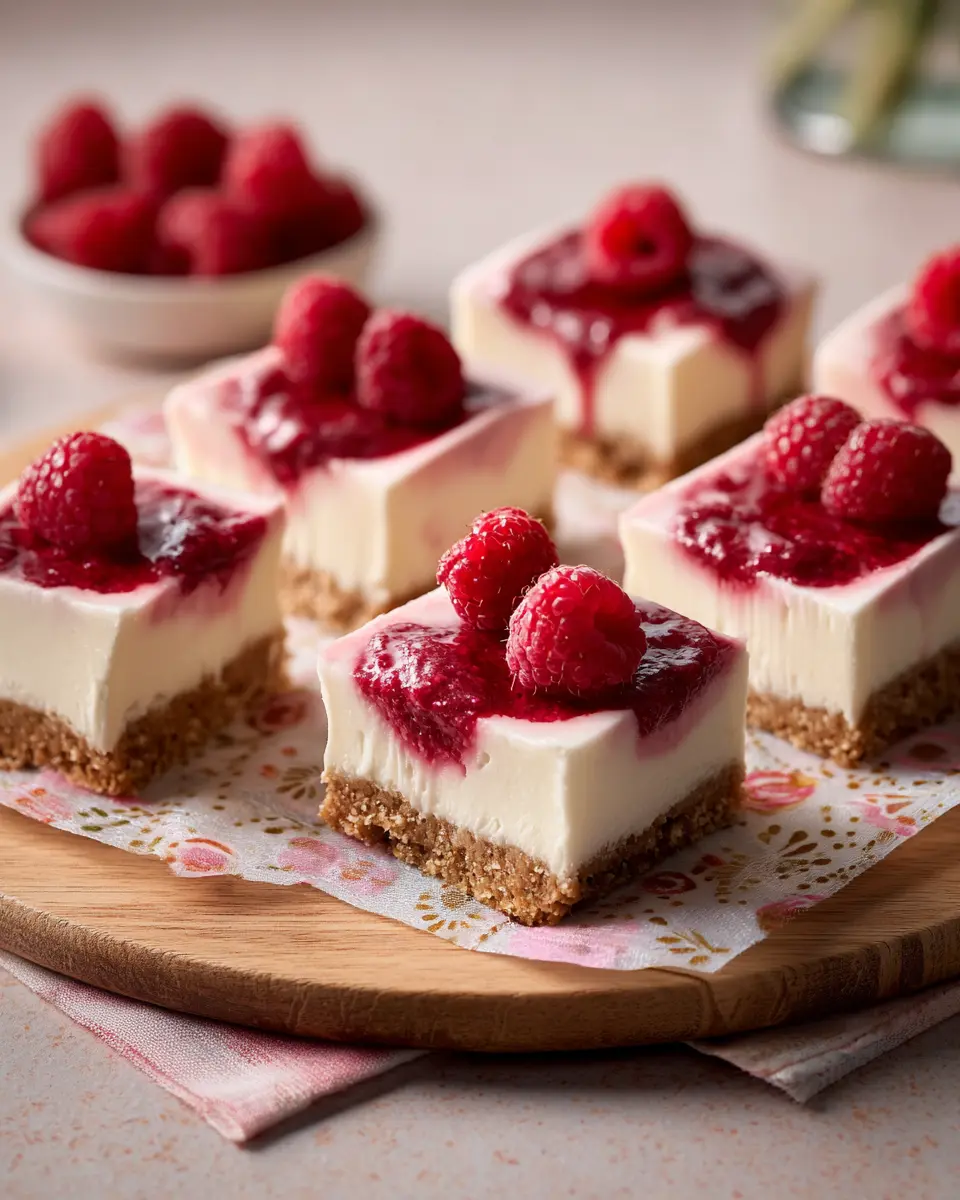
Pour the smooth filling over the prepared crust and gently spread it out to cover the crust evenly. Now comes the fun part! Take ⅓ cup of raspberry preserves and dollop spoonfuls across the top. Grab a skewer or knife, and swirl those preserves into the cheesecake mixture for that beautiful marbled effect. Add fresh raspberries on top in an appealing grid pattern, providing a burst of color and flavor.
Step 4: Chill to perfection
Cover your masterpiece with plastic wrap and slide it into the fridge. Chill for at least three hours, or until it’s completely firm and set. This step is crucial—you want those no-bake raspberry cheesecake bars to have the right texture!
Step 5: Slice and serve
When the cheesecake is firm, gently lift it out of the pan using the parchment overhang and place it on a cutting board. Use a sharp chef’s knife to slice it into 16 or 20 squares, making sure each piece has a raspberry on top for that finishing touch.
Now, enjoy your beautifully crafted no-bake raspberry cheesecake bars at your next gathering or simply indulge yourself after a long day. They are sure to be a hit! For more delicious dessert ideas, check out this Lemon-Blueberry Sheet Cake that balances tartness and sweetness perfectly.
Variations on No-Bake Raspberry Cheesecake Bars
Swap flavors: Strawberry or Blueberry Versions
Feeling a little adventurous? You can easily switch out the raspberries in these no-bake raspberry cheesecake bars for strawberries or blueberries! Simply substitute the raspberry preserves with your fruit of choice, and replace the fresh raspberries with an equal amount of chopped strawberries or blueberries. Imagine the delightful colors and unique flavors – a perfect twist for any season!
Healthier Options: Greek Yogurt and Reduced Sugar
For a lighter take on these delicious bars, consider using Greek yogurt instead of traditional yogurt. This not only adds a protein boost but also enhances the creaminess. Additionally, you can reduce the sugar content by using a natural sweetener like honey or maple syrup. These simple swaps won’t compromise taste but will provide a guilt-free dessert that you can enjoy anytime.
By exploring these variations, you can personalize your no-bake raspberry cheesecake bars to suit your taste and dietary preferences, creating a dessert that's uniquely yours!
Cooking Tips and Notes for No-Bake Raspberry Cheesecake Bars
Tips for Achieving the Perfect Texture
To ensure your no-bake raspberry cheesecake bars have a creamy, indulgent texture, make sure your cream cheese is fully softened before mixing. It’s often easier to work with if you leave it out at room temperature for about 30 minutes. Folding the thawed whipped topping gently into the mixture helps retain airiness, so your cheesecake bars stay light and fluffy. Lastly, allowing the bars to chill for a full three hours will enhance the texture and flavor blend.
Important Notes on Ingredient Substitutions
Don't hesitate to get creative with your ingredients! If you're short on graham crackers, you can substitute them with crushed digestive biscuits or even gluten-free crackers. For a dairy-free option, consider using cashew or coconut cream in place of cream cheese. You can also replace raspberry preserves with other fruit spreads, such as strawberry or blueberry, for a delicious twist. Just keep in mind that substitutions may alter the final taste and texture, so adjust proportions with care.
For more tips on baking and general substitution guidelines, check out King Arthur Baking, where you'll find numerous resources and recipe variations!
Serving suggestions for No-Bake Raspberry Cheesecake Bars
Creative toppings and garnishes
When serving your no-bake raspberry cheesecake bars, consider adding a burst of color and flavor with creative toppings. Fresh mint leaves can add a pop of green, while a light dusting of powdered sugar provides an elegant touch. For extra indulgence, drizzle some chocolate sauce or honey over the bars, or even sprinkle chopped nuts for added texture. You can also serve them with a side of raspberry coulis for that extra fruity punch. Feeling adventurous? Try pairing them with a dollop of lemon curd for a zesty twist!
Pairing ideas with homemade beverages
To elevate your dessert experience, pair these luscious no-bake raspberry cheesecake bars with some refreshing homemade beverages. A zesty lemon or mint iced tea complements the sweet and tart flavors perfectly. Alternatively, whip up a fruity smoothie—think mixed berries or a tropical mango blend! Such drinks not only quench your thirst but also enhance the overall flavor experience; perfect for a sunny afternoon gathering or a cozy night in. You could even create a mocktail using ginger ale and fresh fruit, which adds a festive flair to any occasion.
Feel free to share your favorite serving ideas, and let’s inspire one another!
Time details for No-Bake Raspberry Cheesecake Bars
Preparation time
Getting started on these delightful no-bake raspberry cheesecake bars is quick and easy! You’ll only need about 20 minutes to whip up the crust and filling. Perfect for those busy evenings or spontaneous dessert cravings!
Chilling time
Once you’ve combined all the ingredients and swirled in that luscious raspberry preserves, it’s time for the magic to happen. Chill the cheesecake bars in the refrigerator for approximately 3 hours. This allows the flavors to meld beautifully, and the bars to set perfectly.
Total time
Altogether, you’re looking at around 3 hours and 20 minutes from prep to serving. It’s an easy way to impress your friends or family, with minimal effort and maximum flavor! For more sweet inspirations, check out some great no-bake dessert ideas.
Nutritional Information for No-Bake Raspberry Cheesecake Bars
When indulging in these delightful no-bake raspberry cheesecake bars, it’s good to know what you’re treating yourself to! Here’s a quick nutritional breakdown to keep you informed:
Calories
Each bar contains approximately 250 calories, making this a sweet yet not overly heavy dessert.
Protein
These bars pack about 4 grams of protein per serving, thanks to the creamy filling made with cream cheese and yogurt.
Sugars
With roughly 20 grams of sugar, you’ll enjoy a little sweetness from the raspberry preserves and powdered sugar, giving you just the right amount of flavor.
Enjoying no-bake raspberry cheesecake bars is all about balance! For broader insights into dessert nutrition, check out resources like Healthline. Pair these bars with a simple fruit salad to up your nutrient game!
FAQs about No-Bake Raspberry Cheesecake Bars
How long can I store these cheesecake bars?
You can enjoy your no-bake raspberry cheesecake bars for up to 5 days when stored properly in the refrigerator. Make sure to keep them in an airtight container to retain their creamy texture and delightful flavor!
Can I freeze no-bake cheesecake bars?
Absolutely! These cheesecake bars freeze wonderfully. Just ensure they are wrapped tightly in plastic wrap and then placed in an airtight container. They can last up to 3 months in the freezer. When you're ready to indulge, simply thaw them in the refrigerator overnight for the best results.
What can I use as a substitute for raspberry preserves?
If raspberry preserves aren’t readily available, you can swap in other fruit preserves like strawberry, blueberry, or even peach for a delicious twist. Alternatively, you can make a quick homemade raspberry compote by simmering fresh or frozen raspberries with a bit of sugar and lemon juice. It adds a lovely fruity flavor that complements the creamy cheesecake perfectly!
For more tips and variations, check out this handy guide on fruit preserves for inspiration!
Conclusion on No-Bake Raspberry Cheesecake Bars
Creating no-bake raspberry cheesecake bars is easier than you might think! With simple ingredients and minimal prep, you can impress friends or whip up a sweet treat for yourself. Don’t hesitate to experiment with flavors or toppings—make them your own! Enjoy every delicious bite!

No-Bake Raspberry Cheesecake Bars
Equipment
- 9-by-13-inch baking pan
- rolling pin
- blender
Ingredients
For the crust
- 1 can Nonstick cooking spray
- 18 sheets graham cracker
- ⅓ cup granulated sugar
- 12 tablespoon salted butter, melted (1½ sticks)
For the filling
- 16 oz. cream cheese, softened
- 2 cup vanilla yogurt (Greek or regular)
- 1 cup powdered sugar
- 1 Tbsp. vanilla extract
- 1 container frozen whipped topping (such as Cool Whip), thawed
- ⅓ cup raspberry preserves
- 20 pieces raspberries
Instructions
For the crust
- Line a 9-by-13-inch baking pan with parchment paper, allowing a couple of inches of overhang on the longer sides. Spray with nonstick cooking spray.
- Place the graham crackers in a zip-top bag and use a rolling pin to crush into fine crumbs (about 3 cups). Transfer to a large bowl along with the granulated sugar and melted butter. Mix well and add to the bottom of the lined pan. Press the mixture firmly and evenly into the bottom of the pan, then set aside.
For the filling
- In a blender, combine the cream cheese, yogurt, powdered sugar, and vanilla, then blend until smooth. Transfer to a large bowl. Fold in the whipped topping. Pour the mixture over the top of the prepared crust and smooth it out.
- Add spoonfuls of the raspberry preserves to the top and, using a skewer or knife, swirl the preserves. Arrange the raspberries in a grid across the pan. Cover and refrigerate until completely chilled and firm, about 3 hours.
- Using the parchment sling, carefully lift out the cheesecake and transfer it to a cutting board. Slice the cheesecake into 16 or 20 squares, each topped with a raspberry.

Leave a Reply