
Introduction to Raspberry Bars
Why Raspberry Bars are the Ultimate Dessert for Young Professionals
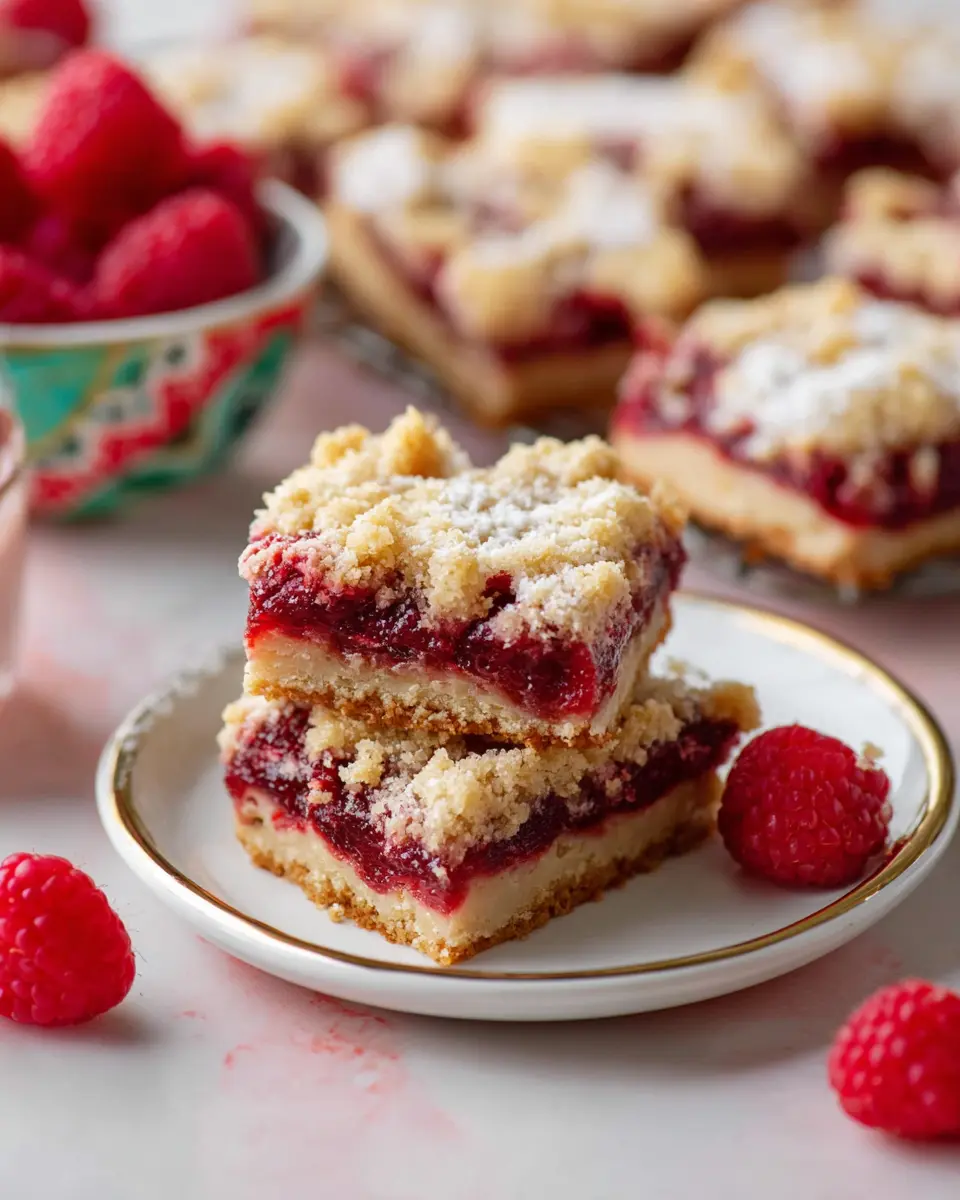
If you're a young professional juggling work, social commitments, and the occasional cooking escapade, raspberry bars are the perfect solution for your dessert dilemmas! These sweet, delicious treats require minimal prep time yet deliver maximum satisfaction. With just a handful of ingredients and about 10 minutes of your time, you can whip up a batch that impresses colleagues at potlucks or brings joy to weekend gatherings with friends.
Moreover, they offer the convenience of being easily portable. Just slice them up, pop them in a container, and you're ready to go—perfect for impromptu summer picnics or outdoor parties. According to recent surveys, 60% of young professionals appreciate quick and easy recipes, making these raspberry bars an ideal fit for your on-the-go lifestyle.
And let’s not forget their versatile nature! You can serve them warm, topped with a scoop of ice cream, or enjoy them chilled with a cup of coffee. The rich raspberry jam swirled within a crumbly oat crust strikes a delightful balance between sweet and tart, making each bite a moment of bliss. So grab your baking pan and get ready to make these delightful raspberry bars—you won’t regret it!
Ingredients for Raspberry Bars
Essential ingredients for the perfect raspberry bars
Creating delicious raspberry bars is simple when you have the right ingredients on hand. Here's what you'll need to make this delightful dessert:
- All-purpose flour (1½ cups): This forms the base for the crumb crust. A quality flour will yield the best results.
- Baking soda (½ teaspoon): This helps the bars rise slightly, giving them a light texture.
- Salt (½ teaspoon): Just a pinch enhances the flavors of the other ingredients.
- Rolled oats (1½ cups): Opt for old-fashioned rolled oats for that chewy texture that pairs beautifully with the other components.
- Light brown sugar (¾ cup): This adds sweetness and contributes to the moistness of the bars.
- Unsalted butter (¾ cup, softened): Using unsalted butter allows you to control the saltiness and gives the bars a rich flavor.
- Seedless raspberry jam (1 cup): Choose a high-quality jam for the best taste, as it’s the star of the show!
With these ingredients, you’ll be well on your way to baking up a crowd-pleaser! Check out resources like King Arthur Baking for further baking tips.
Preparing Raspberry Bars
Making raspberry bars is an enjoyable and straightforward process that will have your taste buds dancing with delight! Here’s a step-by-step guide to preparing these delightful treats.
Gather and prepare your ingredients
Before you dive into mixing, make sure you have everything you need at hand. It can be frustrating to be halfway through a recipe only to realize you're missing an ingredient! Gather the following:
- 1½ cups all-purpose flour
- ½ teaspoon baking soda
- ½ teaspoon salt
- 1½ cups rolled oats
- ¾ cup packed light brown sugar
- ¾ cup softened unsalted butter
- 1 cup seedless raspberry jam
Don’t forget your kitchen tools: an 8x8” square pan, foil, and a pastry cutter (or fork) will be essential.
Mix the dry ingredients together
In a large mixing bowl, whisk together the flour, baking soda, salt, rolled oats, and light brown sugar until well combined. This step creates a base that gives your raspberry bars that delightful crumbly texture.
It’s fascinating to note that using high-quality ingredients, especially your jam, can significantly enhance the flavors of your bars. This is where research shows using quality fruits can make a world of difference—so choose a seedless raspberry jam you truly love!
Create the crumb mixture
Once your dry ingredients are mixed, it’s time to bring in the butter. Cut it into the dry mixture using a pastry cutter or fork until the blend resembles coarse crumbs. If you're wondering about how long this should take, think about a minute or two until it holds together when squeezed—this visual cue is your best friend during preparation.
Assemble the layers in the pan
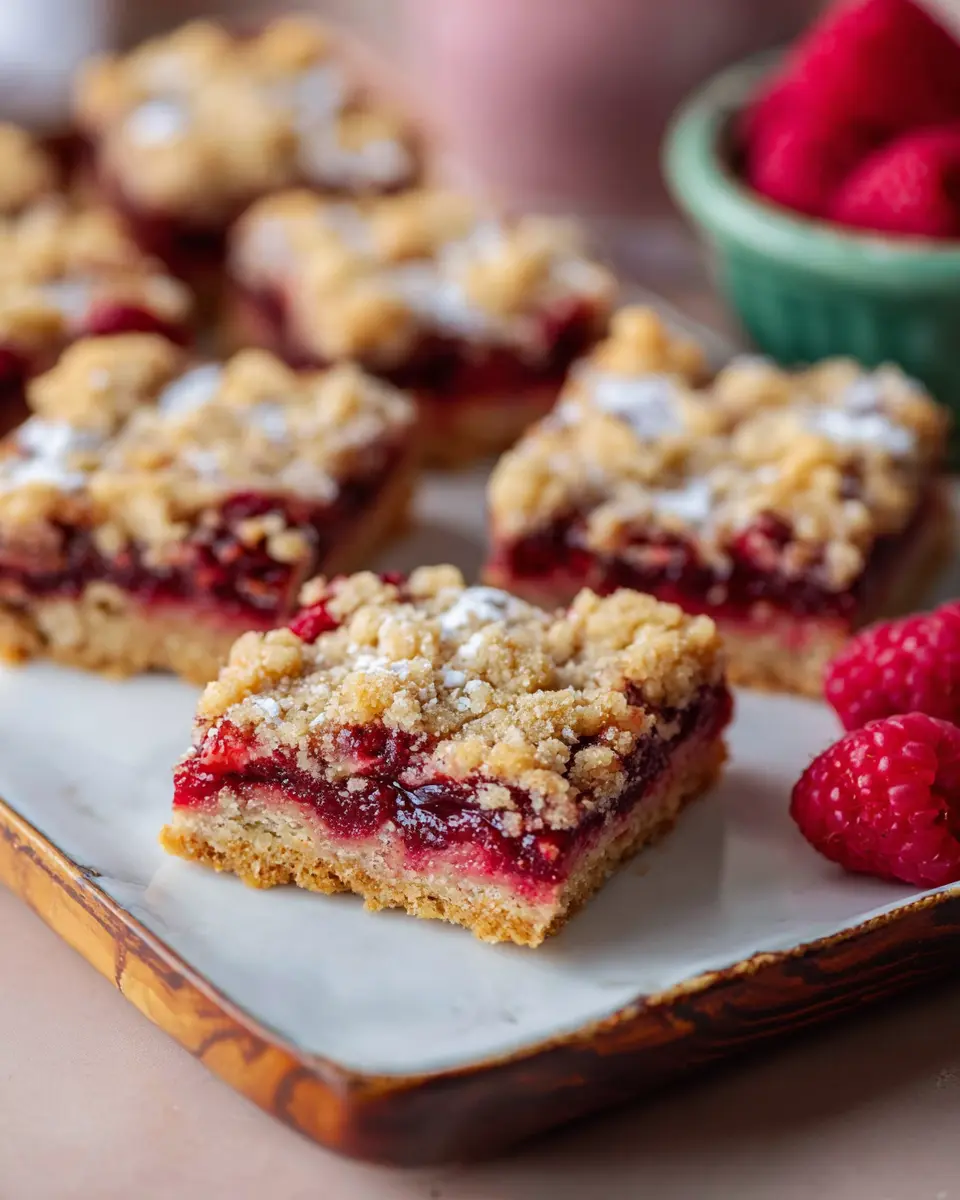
Now comes the exciting part: assembling your raspberry bars! Press two-thirds of the crumb mixture evenly into the bottom of your lined pan. The bottom layer sets a lovely foundation for the jam, so make sure it’s even. Spread the raspberry jam over this layer, leaving about a ½-inch border around the edges. This small detail is crucial to prevent the jam from getting too sticky or burnt.
Next, sprinkle the remaining crumb mixture over the jam. For a delightful crunch, press it gently into the mixture.
Bake and cool the raspberry bars
Preheat your oven to 350°F and let those bars bake for about 35 minutes, or until they turn golden brown and the jam is bubbly. The aroma will have your kitchen smelling heavenly! Once baked, it’s essential to let them cool in the pan for about 1½ hours before slicing. This cooling time allows the bars to set properly, which means neater cuts when you finally slice them into squares.
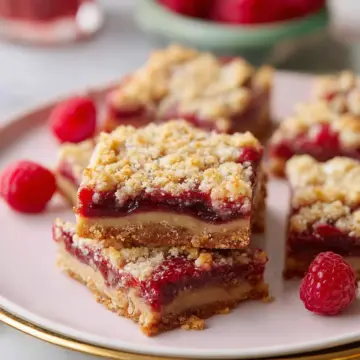
There you have it—the perfect raspberry bars ready to impress at your next gathering! Consider serving them with a scoop of ice cream or fresh fruit for an extra treat. Trust me, they won’t last long!
Variations on Raspberry Bars
Incorporating Different Fruits
While raspberry bars are undeniably delicious, why not mix it up a little? Consider using blueberries, blackberries, or strawberries for a delightful twist. Each fruit brings its own unique flavor profile, making for exciting variations. If you’re feeling adventurous, experiment with a combination of fruits for a colorful, fruity explosion! Each time you swap fruits, you’ll find something new and delightful.
Adding Nuts or Chocolate Chips
For an extra crunch, try folding in chopped nuts like almonds or pecans into the oat mixture. Not only does this enhance texture, but it also adds a bit of healthy fat. Alternatively, if you have a sweet tooth, throwing in some chocolate chips can transform your raspberry bars into a rich, decadent treat.
Feel free to get creative and let your taste buds guide you! You might just discover a new favorite version of these classic bars. For more ideas, check out this article on creative baking variations.
Baking notes for Raspberry Bars
Tips for a perfect crumble topping
To achieve a delectable crumble on your raspberry bars, focus on the texture of your mixture. Make sure to create larger crumbs by pinching the mixture instead of just breaking it apart. This not only adds contrast against the smooth jam but also enhances the overall crunchiness. Don't overwork the crumble; combining until just blended will keep it light and airy.
How to choose the right raspberry jam
Selecting a quality raspberry jam makes a significant impact on your raspberry bars. Opt for a jam that you genuinely enjoy eating, as it will influence the flavor profile of your dessert. You can also explore homemade options or artisan brands, which often boast fresher ingredients and vibrant flavors. Just ensure it’s seedless for a smoother finish! For insights on homemade jam-making techniques, check out this comprehensive guide on homemade jam.

Serving suggestions for Raspberry Bars
Pairing with ice cream and fresh fruit
Indulging in raspberry bars can be taken to the next level when served with a scoop of creamy vanilla ice cream or tangy yogurt. The rich flavors of the bar complement the coolness of the ice cream beautifully. Add a handful of fresh berries—think strawberries or blueberries—on the side for a refreshing contrast. Not only does this enhance visual appeal, but it also adds a burst of flavor with every bite. For an extra touch, drizzle some warm chocolate sauce over the top!
Creative serving ideas for gatherings
When hosting friends or family, consider serving your raspberry bars as part of a dessert platter. Cut them into fun shapes using cookie cutters to make them visually inviting. Pair with a selection of bite-sized treats like mini fruit tarts or chocolate-dipped pretzels. You might even create a self-serve dessert bar, where guests can layer their favorite toppings such as whipped cream or toasted coconut on their raspberry bars. These creative touches not only showcase your skills but also make the gathering memorable!
Tips for Making Perfect Raspberry Bars
Importance of Letting the Bars Cool Completely
Ensuring that your raspberry bars cool completely is essential for achieving that perfect texture. While waiting can be tough, allowing the bars to cool for about 1.5 hours helps the filling set, resulting in neat slices. Cutting them too early may lead to a messy result—definitely not Instagram-worthy!
Common Mistakes to Avoid
To elevate your raspberry bars, keep an eye out for these pitfalls:
- Overmixing the dough: This can lead to tough bars. Mix just until combined.
- Using low-quality jam: The flavor of your bars is heavily dependent on the jam. Opt for a high-quality or homemade option for a burst of raspberry goodness.
- Not leaving a border when spreading the jam: This helps prevent the jam from burning on the edges.
Following these tips will ensure your raspberry bars are a hit at your next gathering!
Time Details for Raspberry Bars
Preparation Time
Getting started on your raspberry bars will take about 10 minutes. This quick prep includes gathering ingredients and mixing your dry and wet ingredients, so you’ll be ready to bake in no time!
Baking Time
Once your mixture is in the pan, pop it into the oven for 35 minutes. You’ll know it’s done when the crumble is golden brown and the jam is bubbly, filling your kitchen with a delightful aroma.
Cooling Time
After baking, patience is key! Let your bars cool in the pan for about 1 hour and 30 minutes. This allows them to firm up perfectly for slicing.
Total Time
In total, from prep to cooling, you’ll spend approximately 2 hours and 15 minutes creating these delicious raspberry bars. For tips on perfecting your bake, check out King Arthur Baking for expert advice!
With these time estimates in hand, you’re well on your way to enjoying a delicious treat that’s perfect for any occasion!
Nutritional Information for Raspberry Bars
Calories per Bar
Each raspberry bar contains approximately 246 calories, making it a satisfying yet guilt-free treat for your dessert cravings. Perfect for sharing at gatherings or picnics!
Fiber and Sugar Content
These delicious bars offer about 1g of fiber and 20g of sugar per serving. While they provide a delightful sweetness, consider pairing them with protein or fiber-rich options like yogurt for balance.
Healthier Substitutions
Want to make your raspberry bars even more nutritious? Here are some ideas:
- Whole Wheat Flour: Substitute half of the all-purpose flour with whole wheat for added fiber.
- Natural Sweeteners: Instead of brown sugar, try using honey or maple syrup for a healthier sweetness.
- Chia Seeds: Mix in some chia seeds to boost the omega-3 content and fiber.
These thoughtful substitutions can elevate both the taste and nutritional profile of your raspberry bars, making them the perfect fit for any diet! Curious about more healthy swaps? Check out the USDA Dietary Guidelines for additional insights.
FAQs about Raspberry Bars
Can I use frozen raspberries instead of jam?
Absolutely! While the recipe calls for seedless raspberry jam, substituting with frozen raspberries is a great option. Just make sure to thaw and drain them well to avoid excess moisture, which could make the bars soggy. You can sweeten the raspberries to your liking, creating a fresh and fruity twist on the classic raspberry bars.
How do I know when the bars are done baking?
To check if your raspberry bars are done, look for a golden-brown crumble topping and bubbling jam. A good practice is to insert a toothpick in the center—if it comes out clean or with a few moist crumbs, they’re ready! Remember, patience is key; let them cool completely to solidify the structure before cutting.
What’s the best way to store leftover raspberry bars?
To keep your raspberry bars fresh, store them in an airtight container at room temperature for up to three days. For longer storage, consider refrigerating them for up to a week. If you want to save them for later, freezing works well too! Just wrap them tightly in plastic wrap and place them in a freezer-safe container for up to three months.
Enjoy your raspberry bars, and let the freshness be a delightful part of your gatherings! For more tips, check out Food Storage Guidelines.
Conclusion on Raspberry Bars
Final thoughts on enjoying homemade treats
Homemade raspberry bars are a delightful way to satisfy your sweet tooth while sharing joy with friends and family. Taking just a few hours to prepare, these delicious treats are an inviting addition to any gathering. Enjoy the burst of flavor they bring, and savor the moments made sweeter!
Raspberry Bars
Equipment
- 8x8” square pan
- foil
- pastry cutter
Ingredients
- 1.5 cups all-purpose flour
- 0.5 teaspoon baking soda
- 0.5 teaspoon salt
- 1.5 cups rolled oats
- 0.75 cup packed light brown sugar
- 0.75 cup unsalted butter softened
- 1 cup seedless raspberry jam
Instructions
- Preheat the oven to 350°F.
- Line an 8-inch square baking pan with foil, leaving a 2-inch overhang on all four sides. Grease the foil with additional butter or nonstick cooking spray.
- Combine the flour, baking soda, salt, rolled oats, and light brown sugar in a large bowl. Mix well to combine. Add the butter and cut it into the flour mixture using a pastry blender or fork until the mixture is very crumbly and holds together when squeezed.
- Press two-thirds of the crumb mixture evenly into the bottom of the lined pan. Spread the jam in an even layer over top, leaving a ½-inch border on all four sides.
- Sprinkle the remaining crumb mix all over the top. Press it gently into the jam layer.
- Bake for 35 minutes or until the crumble is golden brown and the jam is bubbly. Let the bars cool in the pan completely, about 1½ hours. Remove from the pan by lifting out the foil. Remove the foil from the slab and cut into 16 squares.

Leave a Reply