
Introduction to Quick Homemade Crusty Bread
Why Homemade Bread is a Game Changer for Young Professionals
In today's fast-paced world, finding time to cook can be tough, especially for young professionals juggling work and personal life. Enter quick homemade crusty bread—a culinary delight that transforms the way you think about meal prep. Homemade bread not only elevates your sandwiches and toasts but also offers a cozy, comforting experience that store-bought options often lack.
Consider this: a 2018 survey by the Food Marketing Institute found that 47% of consumers believe that enjoying homemade meals contributes to their well-being. Not only is this bread affordable and straightforward to make, but it also gives you a sense of accomplishment akin to mastering a new skill. Plus, sharing a loaf of warm crusty bread can be a delightful way to bond with friends or impress guests.
With just four simple ingredients and minimal effort, you can whip up a delicious loaf that’s perfect for dipping, toasting, or simply enjoying with a pat of butter. As you follow through with the recipe, you’ll discover the joy of baking, which is not only therapeutic but can also save you money in the long run. So why not dive into the satisfying world of homemade bread today?
Ingredients for Quick Homemade Crusty Bread
Creating your own quick homemade crusty bread at home is easier than you might think! You’ll need just a handful of simple ingredients, most of which you probably already have in your kitchen. Here’s what you’ll need:
- 3 cups all-purpose flour: This is the foundation of your bread. All-purpose flour gives a lovely texture and structure.
- 1 ½ teaspoons salt: Salt is essential to enhance flavor and strengthen the dough.
- ½ teaspoon instant yeast: Using instant yeast helps speed up the fermentation process, giving you that delicious rise without long waits.
- 1 ½ cups warm water (about 110°F): Warm water activates the yeast, creating those delightful fluffy air pockets in your loaf.
When selecting your flour, consider opting for organic or locally sourced varieties for added health benefits. If you're curious about the science behind bread-making, check out this interesting article on flour types from King Arthur Baking. Now that you have your ingredients ready, let’s move on to making that irresistible crusty bread!
Step-by-step Preparation of Quick Homemade Crusty Bread
Making your own quick homemade crusty bread can be a rewarding experience. The aroma of freshly baked bread wafting through your home is just delicious! So, gather your ingredients and let’s get started with this step-by-step guide.
Mix the dry ingredients
In a large mixing bowl, start by whisking together your dry ingredients: 3 cups of all-purpose flour, 1 ½ teaspoons of salt, and ½ teaspoon of instant yeast. Mixing these dry components thoroughly is essential for even flavor and texture. The instant yeast will help the dough rise quickly, giving you that lovely crusty exterior without needing to spend hours on the task.
Combine with warm water to form dough
Once your dry ingredients are well combined, it’s time to introduce 1 ½ cups of warm water (about 110°F). Pour the water in gradually and stir it with a wooden spoon until a sticky dough forms. Don’t worry if it feels a bit messy—this is normal! The stickiness is part of what gives your bread that amazing crust.
The magical long rise
Now, it’s time for the magic to happen. Cover the bowl with plastic wrap or a damp towel and let it rise at room temperature for 12 to 18 hours. Yes, you read that right! This long rise is what transforms your dough into a flavorful masterpiece. During this time, the yeast will work its magic, creating bubbles and shaping the structure of your bread.
Preheat your oven and prepare the pot
As your dough finishes its first rise, preheat your oven to 450°F (232°C). Place a cast-iron pot, complete with its lid, inside to heat for about 30 minutes. The pot is crucial for creating a steam-rich environment, which helps develop that gorgeous crust. A well-known tip in baking circles is that any oven-safe pot will do the trick!
Shape the dough
After your dough has risen and doubled in size, it’s time to shape it. Dust a clean surface with flour and gently turn out the dough. Using floured hands, shape it into a rough ball—this doesn't need to be perfect! Transfer the dough seam-side down into a well-floured basket or bowl, cover it again, and let it rest for another 30 minutes.
Final rise before baking
This quick final rise allows your dough to relax and puff up a little more. It’s all about giving it that lightness and airiness. If you're curious about why this step is vital, take a look at this article from The Kitchn.
Baking to perfection
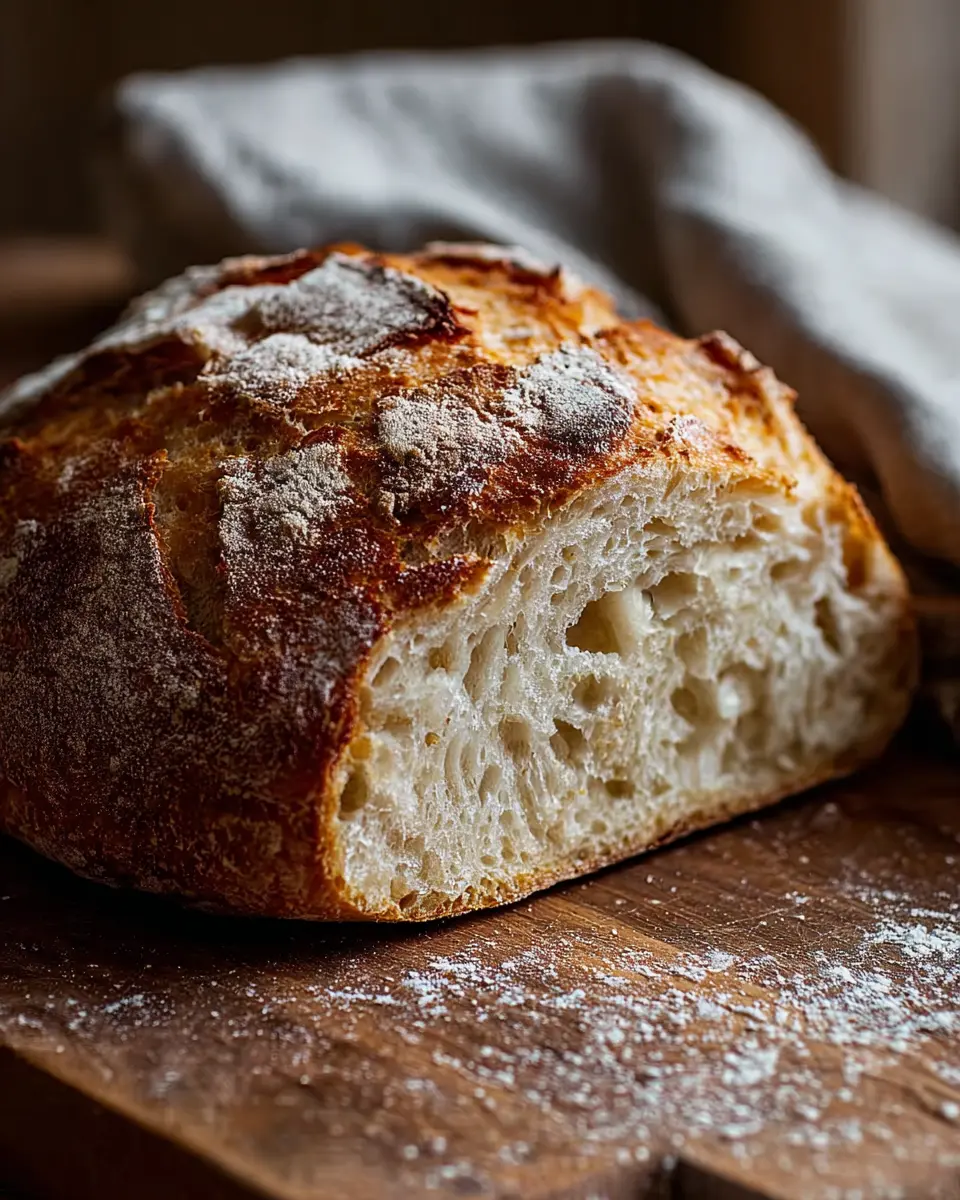
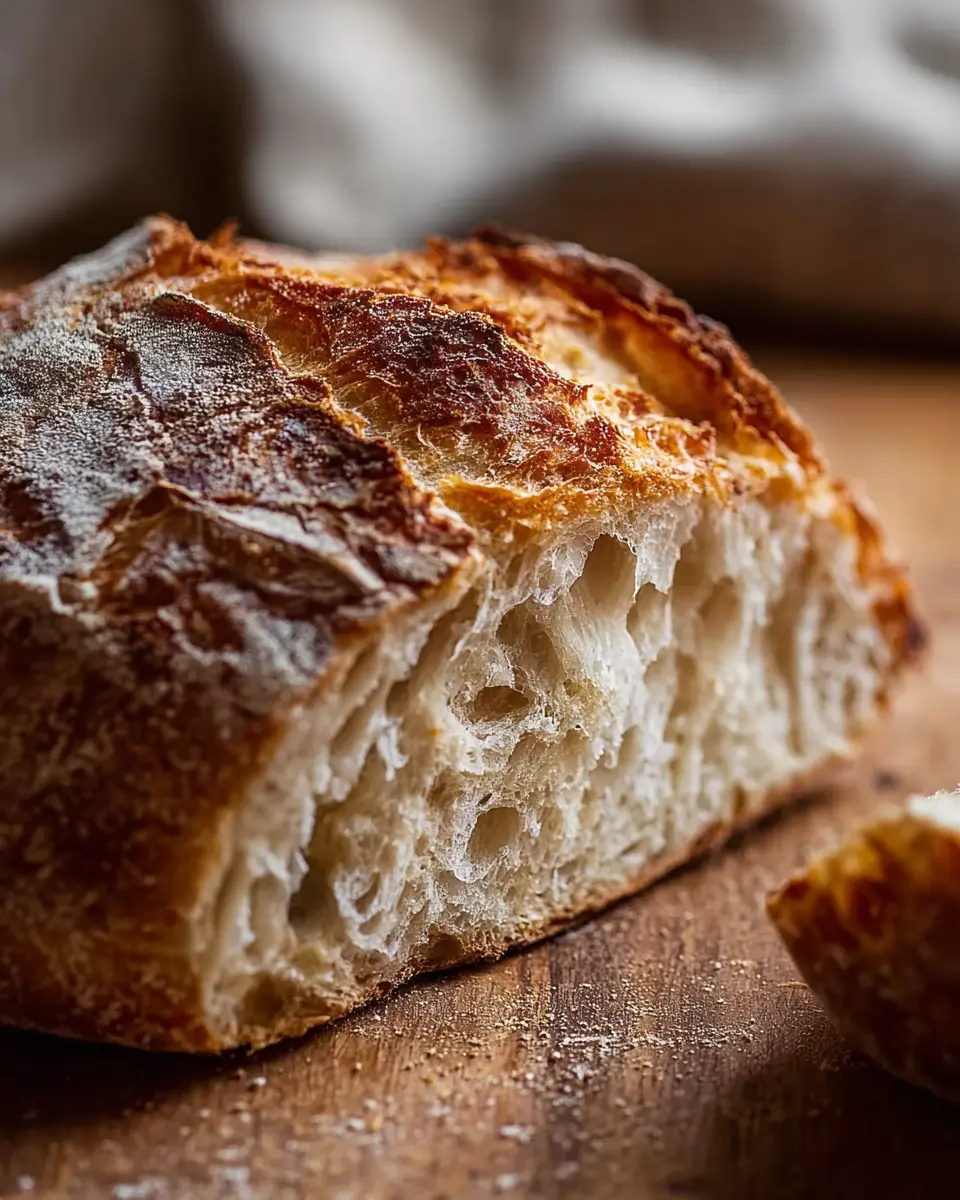
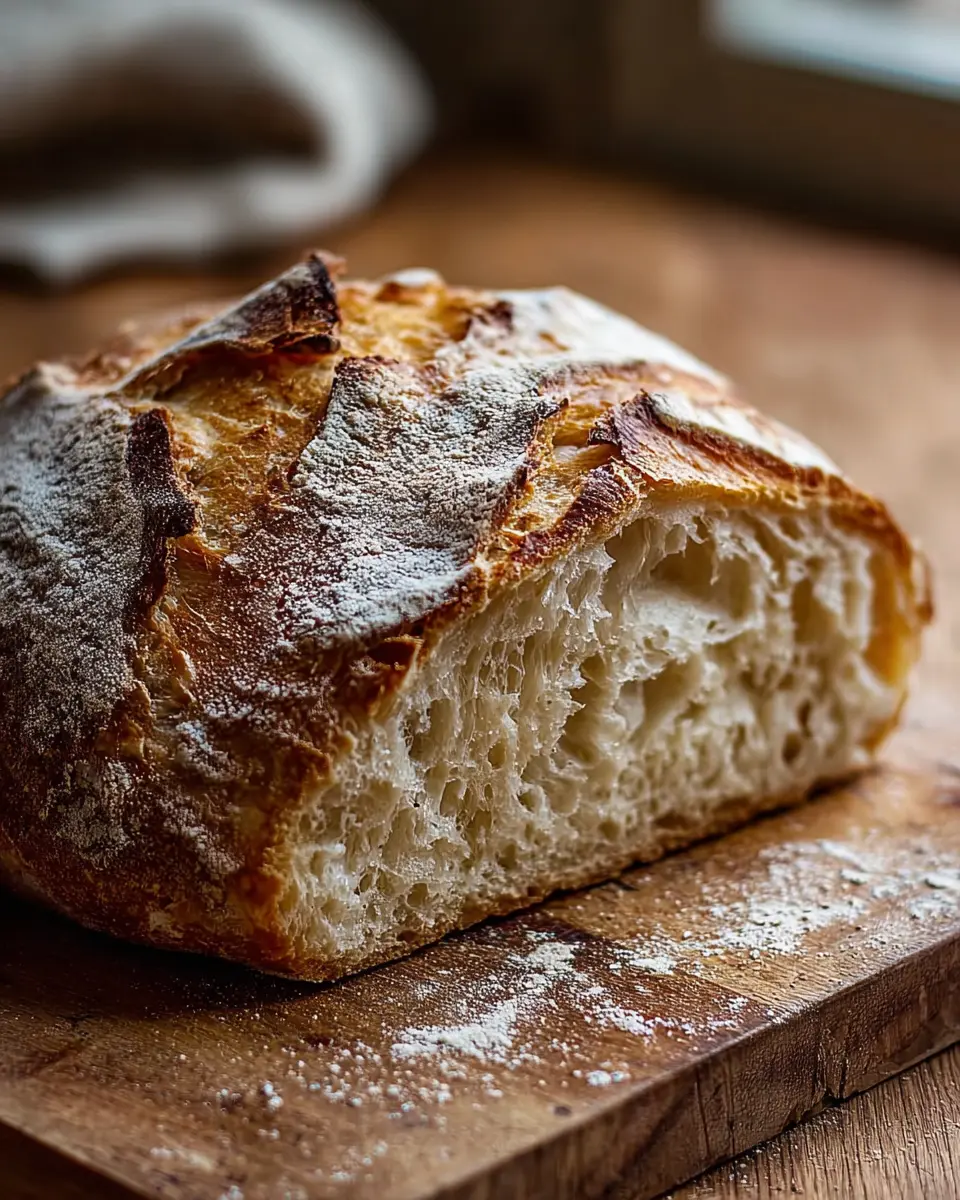
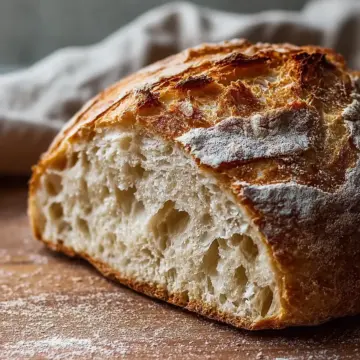
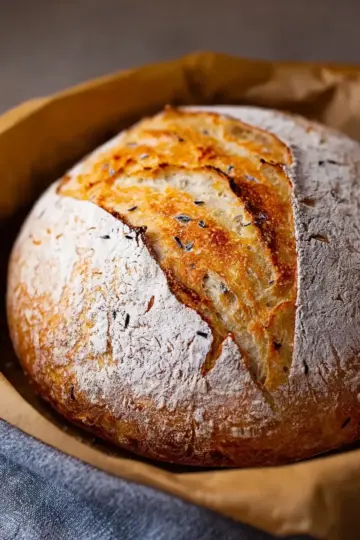
Your patience is about to pay off! Carefully remove the hot pot from the oven and place the dough inside, cover it with the lid, and pop it back in the oven. Bake for 30 minutes, then remove the lid and continue to bake for another 15 minutes or until the bread is golden brown. The sound of the crust crackling as it bakes is just heavenly!
Allow your quick homemade crusty bread to cool on a wire rack for at least 30 minutes before slicing. This step is crucial for achieving the perfect texture in your bread. Enjoy the experience of savoring your own delicious creation!
Variations on Quick Homemade Crusty Bread
Herb-Infused Crusty Bread
Elevate your quick homemade crusty bread by adding fresh or dried herbs. Consider mixing in rosemary, thyme, or basil to the dough for a deliciously aromatic twist. Simply incorporate about 2 tablespoons of your herb of choice along with the flour. This simple variation can transform your bread into a delightful accompaniment for soups or salads. If you're interested in the benefits of using herbs in baking, check out this article on the health benefits of herbs.
Whole Wheat Crusty Bread
For a heartier option, substitute whole wheat flour for half of the all-purpose flour in your quick homemade crusty bread recipe. This adjustment not only adds a nutty flavor but also boosts the nutritional value, providing more fiber and minerals. Ensure you adjust the water slightly, as whole wheat flour can absorb more liquid. This variation is perfect for those looking to add more whole grains to their diet while still enjoying scrumptious, crusty bread. Want some more tips on healthy baking? Check out the latest trends in whole grain recipes here.
Cooking Tips and Notes for Quick Homemade Crusty Bread
Making quick homemade crusty bread can be an incredibly rewarding experience, even for beginner bakers. Here are some handy tips to elevate your loaves:
-
Stay Patient: The long rise time is key to developing flavor and texture. Don’t rush it; this is where the magic happens!
-
Temperature Matters: Use warm water around 110°F. Too hot, and you’ll kill the yeast; too cool, and it won't activate.
-
Don’t Overwork the Dough: Mix just enough to combine ingredients. A sticky dough is normal and encouraged!
-
Use the Right Pot: A cast-iron pot creates that perfect steamy environment for crust formation. If you don’t have one, you can use a Dutch oven or any heavy oven-safe pot with a lid.
-
Experiment with Add-Ins: Consider tossing in herbs, cheese, or olives for added flavor. Why not try some roasted garlic for a twist?
For more tips on baking and bread honesty, check out resources from the King Arthur Baking Company. Enjoy your baking journey!
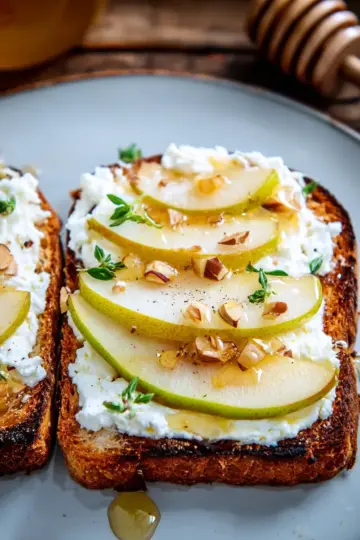
Serving Suggestions for Quick Homemade Crusty Bread
Enjoying your quick homemade crusty bread is all about how you serve it! Here are some delightful ways to elevate your bread experience:
-
Pair with Spreads: Consider slathering on creamy butter, olive oil, or a zingy herb-infused spread to enhance the flavors. A homemade garlic herb butter can really take it to the next level.
-
Sandwich Creation: Use your bread to craft a gourmet sandwich. Layer with turkey bacon, fresh greens, and a dollop of mustard or homemade aioli for a satisfying lunch.
-
Soup Companion: Serve your crusty bread alongside a hearty soup, like a classic tomato or a rich chowder, to soak up every bit of flavor.
-
Bruschetta Delight: Toast slices and top them with diced tomatoes, basil, and a drizzle of balsamic reduction for a simple yet elegant appetizer.
These serving ideas not only complement your bread but also let your culinary creativity shine. For more bread inspiration, you might enjoy checking out resources like the King Arthur Baking Company or The Kitchn.
Time Breakdown for Quick Homemade Crusty Bread
When you’re craving fresh bread, time management is key. Here’s a quick breakdown for quick homemade crusty bread that’s as simple as it is satisfying:
-
Preparation time: 15 minutes
Get your ingredients together, mix, and you’re set to rise! -
Rising time: 12-18 hours
The long rise means flavor; perfect for letting the dough develop while you sleep. -
Baking time: 45 minutes
This includes both covered and uncovered baking to achieve that perfect crust. -
Total time: 12 hours 60 minutes
Most of this is hands-off while your dough works its magic!
By planning ahead, you can enjoy freshly baked bread with minimal effort. Don't forget to check out sites like King Arthur Baking for more bread-making tips and techniques!
Explore the joy of making your own bread; you’ll be amazed at the transformation and deliciousness that awaits.
Nutritional Facts for Quick Homemade Crusty Bread
When you whip up a loaf of quick homemade crusty bread, it's helpful to understand what you’re indulging in. Here are its nutritional highlights:
Calories
This delightful bread contains approximately 120 calories per slice, making it a satisfying complement to any meal without the guilt.
Carbohydrates
Each slice offers about 25 grams of carbohydrates, providing a solid energy boost—perfect for fueling your busy day.
Protein
You’ll find roughly 3 grams of protein per slice, adding a bit of nourishment to your table while still keeping it light and delightful.
These nutritional facts can vary based on your ingredients, so feel free to explore whole grain flours or add seeds for added health benefits. For further reading on bread nutrition, check out the USDA Nutrition Database.
FAQs about Quick Homemade Crusty Bread
What if I don’t have instant yeast?
No worries! If you only have active dry yeast, you can still whip up this quick homemade crusty bread. Simply activate it by dissolving it in warm water for about 5-10 minutes before mixing it with your flour and salt. This will ensure your dough rises perfectly!
Can I use bread flour instead of all-purpose flour?
Absolutely! Using bread flour will give your bread a chewier texture and enhanced rise due to its higher protein content. If you prefer a heartier quick homemade crusty bread, go ahead and swap in that bread flour. Just note, you might need a little less water as it tends to absorb moisture differently.
How should I store leftover bread?
To keep your crusty bread fresh, wrap it in a clean kitchen towel or paper bag and store it at room temperature. For longer storage, slice and freeze it—just be sure to wrap each slice well to prevent freezer burn. When you’re ready to enjoy it again, pop it in a toaster or oven to revive that delicious crust.
Conclusion on Quick Homemade Crusty Bread
Baking quick homemade crusty bread is not just about the final product; it’s about the experience of creating something delicious and comforting. With just a few ingredients and effortless steps, you can enjoy fresh bread that elevates any meal. Try this recipe and savor the happiness it brings!
Quick Homemade Crusty Bread
Equipment
- Large mixing bowl
- Wooden Spoon
- cast-iron pot
- wire rack
Ingredients
- 3 cups all-purpose flour
- 1.5 teaspoons salt
- 0.5 teaspoon instant yeast
- 1.5 cups warm water (about 110°F)
Instructions
- In a large mixing bowl, whisk together the flour, salt, and instant yeast until well blended.
- Pour in the warm water and stir with a wooden spoon until a sticky dough forms.
- Cover the bowl with plastic wrap or a damp towel and let it rise at room temperature for 12-18 hours until doubled in size.
- Preheat your oven to 450°F (232°C) and place a cast-iron pot with its lid inside to heat for about 30 minutes.
- Dust a clean surface with flour and turn out the risen dough onto it. Shape gently into a rough ball.
- Transfer the dough seam-side down into a well-floured basket or bowl. Cover and let rest for another 30 minutes.
- Carefully remove the hot pot from the oven, place the dough inside, cover with the lid, and bake for 30 minutes.
- Remove the lid and continue baking for an additional 15 minutes until golden brown.
- Let cool on a wire rack for at least 30 minutes before slicing.


Leave a Reply